Showing posts with label sewing. Show all posts

Friday, October 3, 2014

The Benefits of Owning a Rocketship

First off, there is less swearing. This is a benefit to all. At first I thought that my new machine didn't actually make things go faster, but I realized last week that indeed when I am swearing less and fixing things less, projects do get done more quickly. Imagine that!

This is the promised post about how very cool my new rocketship is.

Its major benefit is this thing in the photo below, called the Acu-Feed Foot. A sewing machine "foot" is whatever piece of metal or plastic is holding your fabric from the top and pressing it against the metal plate below. These feet are removable, and depending on how they are designed, they can achieve different things, like attach a zipper, darn a hole in something, or sew crazy fun stitches. This one here has little guiding grabbers that pull the fabric from the top and help it to feed evenly along under the needle. You can't really see the top grabbers in this photo but you can see the ones that grab the bottom layer of your fabric. Those are the teeth-like metal parts you see running vertically in the middle of the picture. They're called feed dogs but I don't know why. I get that they feed the fabric but I don't get the dog part.


But I am not that interested in finding out, so we'll move on. When you are sewing through a lot of layers, or if you have to go over big bumps such as at the beginning of something thick, this foot will do it. My previous machine had to be coaxed, coerced, or just throttled into going over big bumps, and it always slid the top layer off the bottom layer, making things crooked. (For those of you who are sewers and want to know why I didn't own a walking foot, I did and it made very little difference.) This machine just slides right over those bumps, hallelujah.

Another extremely cool feature is the needle plate, which is that big flat piece of metal with grooves and holes on it. This machine comes with two needle plates. The one I have installed at the moment has two little holes right next to each other which you can see in the middle of the photo above. Those are the only places the needle will go with this plate--either in the middle or slightly to the left. Why does this matter? Well, first off any flimsy fabric you want to use will not be crushed into a wide hole by the powerful needle. Secondly, any narrow piece of fabric will not get smashed into a wide hole. This is what matters to me.


Above you see me sewing a narrow strip of fabric that's going to be a tie in the back of a smock. I've told the needle (in the photo the needle has a little red dot on it, and it is poking down through the fabric) to go in the left-hand hole so that the grabbers on the left of the foot will grab as much of the fabric strip as possible, thus guiding it straight and true. This whole set-up is a gigantic time saver. The narrow little strip does not get eaten from below, the bump at the end of the tie slides under smoothly, and the layers of fabric all line up correctly at both ends. It's truly stunning and makes me want to jump for joy. I realize that for most of the world, indeed for all of the people with whom I live, this is completely not interesting, but you are reading, so...keep reading. 

The other needle plate, which just pops in and out with a little lever, has a very wide hole in it to allow the needle to move side to side and make many, many different stitches. Here is a photo of all the stitches it can make. 


That's the lid of the machine propped open, showing what each stitch looks like and which number to punch into the computer so that it will sew the stitch you want. The computer is down there at the bottom right. There are a zillion stitches and I know I will never use them all. I tend not to be wowed by the different stitches a machine can make. I bought this machine because of its power, its precision, the enormous size of it, and the features I'm talking about now. Someday I might use many of those stitches but I haven't used any of them yet. Seriously, noting except the straight stitch so far.

You can see in the photo above some of the slots for the different feet the machine comes with. I think it came with about 15 or so; only the ones the manufacturer thinks you will use most often are stored in the top. The rest live in a compartment the fits under the machine. So far I have used the zipper foot and the regular foot but I've got some applique coming up shortly and I am sure in the distant future there will be some quilting.


Here's some of the handy features that entry-level machine's don't have. At the top of the photo above you see a scissors button. This cuts the threads when you are finished sewing and brings both the top and bottom threads to the bottom so you don't have to snip them later with your itty bitty snipping scissors. Another little convenience. The double arrow button allows you to decide whether you want the machine to stop with the needle up, out of the fabric, or down, in the fabric. I like it down because I am usually stopping just to make a turn, and if your needle comes out of the fabric and you try to turn your project it doesn't work--you lose the stitching line you were making and you basically create a hole in your seam. The target-looking button is very handy. It locks the beginning and end of the stitching line for you by having the machine make several stitches in place. Next down is the reverse button, which all machines have so it's not that special. But I do like how I can program this machine to make a lock stitch or a reverse stitch at the beginning and end of every line I sew. I definitely did not have that before.


Finally, a photo of the whole thing. See the area where my pin holder is? That area is called the harp and it matters to some people how big it is, because the bigger it is the larger the project you can work with. This one is eleven inches wide, which is the widest I have heard of. I love that much of the time my pin holder can just sit there being very convenient!

You can also see that the machine comes with a large clear table that slides on from the left, which is also great for resting big projects. When heavy fabrics are pulled by their own weight off the edge of a smaller table, the stitches can come out warped, or worse, you can hurt your machine by all that sideways pulling on the needle. This big table has eliminated any of those types of problems for me.

So these are the main reasons I bought this machine. I also just like the feel of it when sewing and how very quiet it is. I actually purchased a completely different machine at first, which after a couple of days I took back to the store. It was an even more expensive thing from Bernina and it worked a lot like a princess in my view. Demanding, dainty, and very picky. Every little thing involved pushing multiple buttons on the computer. And it was insanely loud. I know quilters love, love their Berninas, but my Janome is much more my style.

Nope, no one has paid me to say all these nice things about my machine. Janome does not know I exist and I don't think the sewing machine store knows I have a blog. I'm just pretty pleased that my months of research and lengthy test drives led me to just the right choice for me, and I am so, so grateful that my shop's success made it possible for me to get it! 

Thursday, May 8, 2014

U Pick 'Em Contest

It's my first contest on LilaCreates! 

When I was in college my coach used to have U Pick 'Em Fridays in the fall season (crew is a three season sport). This meant that we, the lowly rowers, got the chance to assign ourselves to the seats in the boats rather than having him pick the line-ups. Then he made the boats race each other. There was quite a fair amount of pressure because you had to think about how he thought about everyone, which of course he never actually said out loud, so that you could place yourself among teammates who would help you win those races. And those teammates were all your friends. Lots of psychology going on here.  

But this isn't like that at all. I just stole the name, not the heart-wrenching, nerve-wracking feelings that went with those collegiate U Pick 'Ems. This is all fun. So here it is: I bought this gem of a fabric below a little while ago at the mill. I only bought one yard because I was not sure how to use it. It is made of cotton sailcloth, which is like canvas or duck cloth only lighter weight. It is tightly woven and, though it feels substantial, it is also really soft. It does not stretch. It's got what fabric gurus call a really nice "hand." I think the pattern is super fun, but it is somewhat large. Each group of those rainbow things is about 7" x 8" (18 x 20cm). Each rainbow by itself is 1.5" (4cm) across. In the second photo below the fabric is draped over a square table measuring 16 x 16" (41.5 x 41.5 cm) The color is blue-green on natural. And get this! No one at the mill could tell me who designed it. I thought that was a little strange, but all I could find out is that it is a discontinued pattern by....someone.


So, the challenge to you is: What should I make with it? I'd like to hear many ideas: get creative! Ask your coworker. As your mom. Ask your kid. Send them the link. Please post your ideas--as many as you want--in the comments by May 24th. And if I pick your idea? You get a choice: either a snack sack set or a $20 gift certificate to use yourself in my shop or to give away. And I'll make the item you suggested and credit you in the item's description! Think of the glory!


So get moving. We've only got a couple of weeks for this and you don't want me to come up with an idea on my own, do you? Oh, and one more thing. Keep in mind that I don't do clothing for people because of the regulations, but I do feel pretty confident that I could make nearly anything else, given the time. If this goes well, I'd like to make it a regular blog feature with new fabrics I pick up. Please spread the word so everyone can participate, and so that I can continue to have these contests in the future!

Tuesday, May 6, 2014

Custom Work Makes Me Happy!

Hi everyone! We're welcoming spring around here. Finally!!

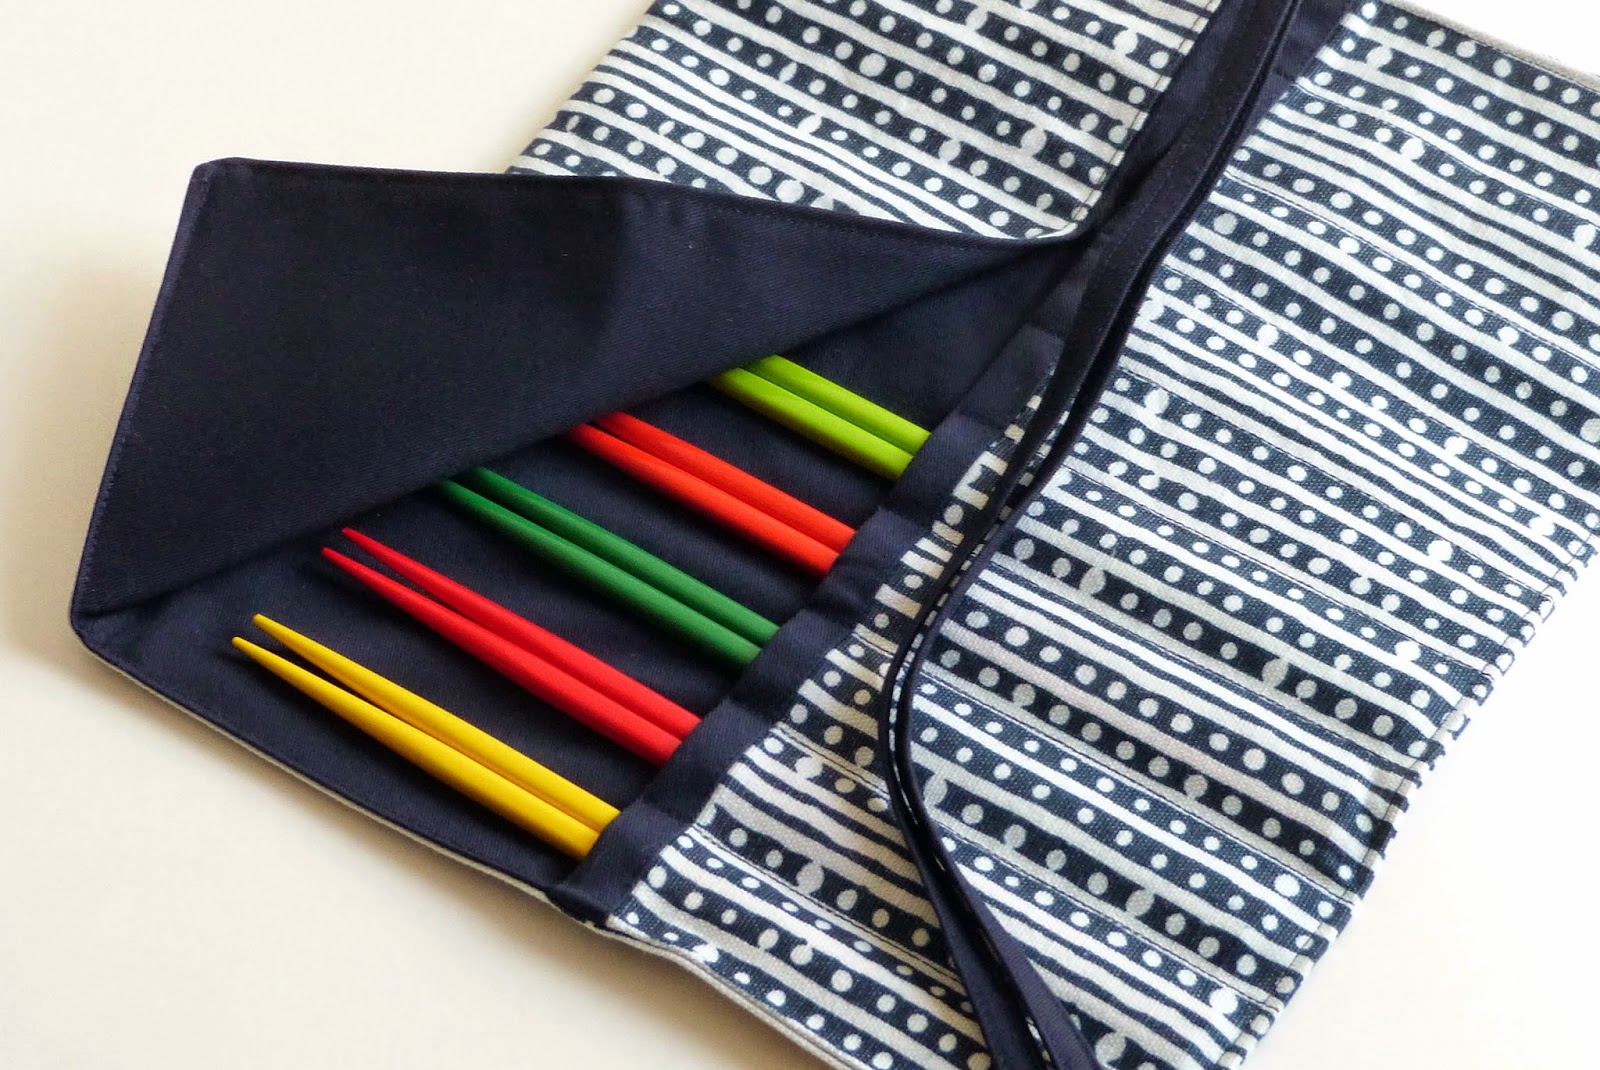
We've had a bunch on our plate here in our house the past couple of weeks and I haven't been able to do much blogging or sewing. But I've been working on a special order from a customer who likes to cook. She asked me to make some changes to my pencil rolls so that they would hold eating utensils--spoons, knives, and forks as well as chopsticks. So I made a new pattern with slightly wider slots and a much taller back. Now her utensils will all fit inside and still have a protective flap over the top. 

Those are our family's colored chopsticks. They are really fun. 
All closed up I think the roll looks really smart. It's going to be a gift for a friend of hers. 
Custom work is great for me because I really enjoy working directly with someone to help them get exactly what they want. I also appreciate the opportunity to develop new patterns and create new items. It's a fun challenge to tweak things or even to create completely new one. I also find it valuable to communicate with customers since I always learn something new, whether it is what attracts people to my shop or how they use the things I make. So keep those custom orders coming! 

Here are some photos of previous custom orders. 

A tween sized apron in pink and grey linen. One of my all-time favorite creations. 

A petite apron in a gorgeous pastel blue and white floral linen. 

A simple pencil holder in pinks and lime green.
The customer was going to attach it to a bag she was making for her daughter. 

Child-sized play oven mitts made with all the little scraps of these fabrics I had left.
The customer purchased a ready-to-ship apron in these fabrics as well. 

A pinafore smock for a toddler made with fabric the customer purchased. 

A child apron in fabrics I hadn't thought to put together! 

Two little tote bags/purses for the customer's daughters in fabrics she purchased. 

A pencil roll with a covered button closure instead of the ties. 

And finally, you can't tell how adorable this is from the photo, but it is a toddler-sized tie-back smock.
It is super tiny and super cute. The hanger it's on is a child sized hanger. Maybe that gives you an idea.


Monday, March 31, 2014

Interested in Sewing? Hope You Like Ironing!

Today I made three pencil rolls in my new style. These hold twelve pencils or pens (or makeup brushes), even wider ones like fountain pens, and the roll has a flap that folds over the contents so they can't fall out when rolled and tied. Each roll uses three coordinating fabrics. That's my favorite part of making these--choosing the fabrics for them. There are so many possibilities!  If you'd like to share any ideas, please leave your thoughts in the comments. You can have a look at the fabrics available in my shop and see if there are any combos you can think of that I haven't considered.

Main fabrics, left to right: Unison "Larch," Albert Hadley "Fireworks," LuluDK "Minerva"

While I was making these today I thought (again) about how much sewing time is actually ironing. I don't really like ironing. There are napkins and tablecloths and dress shirts that have been sitting around my house for months waiting to be ironed. But ironing while sewing is essential. I would guess that I spend about half my construction time cutting and ironing at different stages rather than sewing. So I took some photos during the process of making the purple pencil roll so you could see how much ironing and other not-sewing is involved in just one little item for my shop.

First, I have to iron the huge swaths of fabric that I've purchased and hang them or store them neatly (ha! neatly!). But even before doing that I wash and dry everything. I didn't think you'd be too interested in seeing a photo of my washing machine, so I've skipped those steps. I usually try to do that right when I've brought the fabric home anyway. Next, I cut the fabric pieces according to the pattern I've made. For a pencil roll, that's seven pieces. I use my rotary cutter, which is like a pizza cutter, and a big ruler to make straight edges. I've got a number of smaller rulers I use regularly too.


Next I iron what's called interfacing to one layer of the pencil roll's fabric (no photo of this either because I forgot). Interfacing comes in many styles and adds weight and structure to what you're making. For these pencil rolls, I use a cotton interfacing that irons directly onto the back of one piece of fabric. Even though I use very high thread count fabrics, the interfacing makes the pencil roll just a little more hefty. The end product feels good and strong. If you're interested, here is a nice introduction to the different kinds of interfacing out there.


Next I iron all the little strips of fabric that make the ties and that enclose the top of the pencil pockets. Don't they look nice in the photo all together? Each of these pieces is folded (and ironed) once down the middle, then opened, then each long edge is folded (and ironed) again toward the middle. Finally, the whole thing is folded (and, yes, ironed!) again down the middle. I pin the pieces while I do the next ones so they don't undo on me.

Finally! A sewing moment! It is hard to believe how much non-sewing goes into sewing. Below is a photo of that piece of binding at the top of the pencil pockets getting sewed on. First I sew it to the pockets piece along one of those creases I made in the last step.


Then I fold the binding piece up and over to the back of the pocket piece. Naturally, I iron the seam I've just made. Every time you sew a seam, in fact, you have to press it. Every time. It sets the thread in the fabric, making it more secure. 


Above is what it looks like folded over and pressed. Below is the stitching I then did on top of the green fabric to secure that piece completely to the purple/white fabric. I try to get as close to the edge of the green fabric as possible, and I try to be really, really straight. When I first started sewing, this was not easy, but I am much better at it now. There is, by the way, a more conventional way to sew this seam below, which is to put it on the purple and white fabric, right up next to the green one, catching the green fabric underneath on the other side. It's called "stitch in the ditch." But that, I have found, is enormously difficult to do well by machine, so I just sew on the green. I think it looks very neat and trim.


 If you flip it over, it looks like this: 


See? The last set of stitching I did caught the green fabric on the back, securing it completely to the purple and white fabric. Once again, I iron. 

Then I move on to making the ties. I sew along both long edges because I think it looks better. Some people only sew along the open edge of a thing like this, but I like to do both. 


And guess what? After sewing those seams down, I go and iron the ties. 

Next up, marking where the slots will go. I use my pattern with the pencil lines and make a little blue dot with my disappearing ink pen at the top and bottom of each pocket. 


Then I join the dots with stitching, up and back on each line. I'm now attaching the pocket piece to the solid purple, which will be the inside, or lining of the pencil roll. 


When that's finished, I spray the thing with water to take off the little blue dots I made, then--woo-hoo--iron again. We are getting close to the end now, though. 


Next up, I pin the pockets/lining piece to the outside piece. I put them together so that the good sides of the fabrics are facing each other. That way I can turn them inside out later. See my cool pin holder on the left? That is a magnetized piece of Rimu wood from New Zealand that I got on my honeymoon. One of my favorite things. 


Now you see I have sewn around most of the pencil roll, leaving a space for turning it right side out, and I've clipped the corners so they will more likely come out as a point. If you don't do that then the fabric gets all bunched up there and looks pretty bad when you turn it right side out. With my trusty chopstick I poke out those corners and make sure all the edges are nice and straight. 


The very last step is to sew along the edge again, making a nice white stitching line all the way around, and closing the hole that allowed for the turning. Wait, that's actually not the last step. The real last step is, you guessed it, ironing around that new stitching along the edges. 


I didn't realize when I started these today how great they all look together, but I love the jewel tones all next to each other, don't you?


They'll be showing up in the shop soon!  Don't forget to suggest some new combos for more pencil rolls! 

Sunday, March 30, 2014

My First Sewing "Teacher"

Happy Sunday! Thought I'd tell you a little story. When I first decided to learn to sew a few years ago, I went to the library and got some books. Sure, I could whip up a pillow case without directions but I wanted to be able to make something more complicated, which was going to require some research. [Quick side note. HG is currently dragging her father around the living room dancing to "No Woman No Cry," which is pretty amusing.] One of the books was the amazing Bend the Rules Sewing by Amy Karol.


This is the perfect book for anyone wanting to learn to sew these days. You don't have to actually do any of her projects, but the unconventional directions she includes and the neat ideas offer both plenty of inspiration and plenty of practical, get-it-done advice. She's funny, she's charming, and she's a great sewer! 

Amy also has a blog, called the Angry Chicken. One of the first projects I tried from there was this fun and easy one on felt hairclips. I made a lot of hairclips. AM made a lot of hair clips. Some of ours came out pretty well, and HG even wore some for a while. She's moved on to headbands now, though. But I do still use a  bias tape application method I learned from Amy on this hysterical video. You should watch it even if you don't want to learn how to sew. What is bias tape, you ask? Bias tape is a thin folded piece of fabric that is a little stretchy (because it's cut on the bias) that covers the edge of something else. Sometimes it matches the larger fabric and sometimes it contrasts. You might have seen it along the neckline of a blouse or dress, or you can also see an example here on my snack sacks. I definitely still use her method for sewing it on!


So if you'd like sewing to be in your future, I highly recommend Amy's book to start. Go for it!  Maybe you'll open an Etsy shop too!

P.S. HG is still dancing, though the music has now progressed to Fleetwood Mac. 
P.P.S. Amy Karol has no idea who I am. I just really like her book.

Monday, March 24, 2014

Our Newest Family Member!

Did I surprise you with that one? Introducing Baby, HG's new doll (yes, that is the name HG has given her). I have been thinking for years of getting her a soft, Waldorf-style doll and have held off for a number of reasons. First, she has quite a few hand-me-down dolls from her sister. Second, a handmade Waldorf doll is expensive. Third, I wasn't really even sure she was all that interested in dolls. Turns out to have been a very, very good purchase, and well-timed, too.


Waldorf dolls are entirely soft--there are no plastic or wooden parts. They are most often made of a cotton knit fabric for the skin and stuffed with wool. The softness gives them great huggability and also allows the heat of the child to transfer to them, giving them a warmth you can't find in a doll made of synthetic materials. Their features are ultra-simple so that the child can use his or her imagination and give whatever feelings she or he wants to the doll. The man who started Waldorf education, Rudolf Steiner, thought dolls should be even simpler. He suggested that you could form one out of a napkin and make dots with ink for eyes. But there are some ideas of Steiner's that I think we can just leave with him. Actually, that idea reminds me of my friend, a mom of one of HG's classmates, who suggested that for HG's birthday I give her doll an invisible friend. Just wrap up a box and put nothing in it. This is a lot funnier than the man who seriously suggested giving a wrinkled up napkin as a doll. But still, I'm not going to do it!
Anyway, I purchased HG's doll from WildMarigold, on Etsy. HG decided on the hair, skin, and eye color. Jennie, the owner, was most accommodating when HG changed her mind at the last minute about the eye color. As a sewer, I can tell you that the construction of HG's doll is both beautiful and durable. I was not about to tackle the challenge of making a doll myself (and you can, with kits or entirely on your own), and I'm very glad Jennie made her for us. She is much faster and much better at it than I would be!


HG has been carrying Baby around everywhere. She arrived just before HG succumbed to a terrible bout of flu and missed several days of school with a fever that went as high as 104. She calls her the best doll in the world. But until today Baby hasn't had any clothes. While Jenny at WildMarigold makes clothes too, I thought I could figure that part out myself. For this first dress I adapted a pattern from ScientificSeamstress. I just used the construction method from a girls' dress pattern I bought from her (her name is Carla) and drew out a pattern free-hand that was much smaller. It took a few drawings before I had something that would fit Baby, but still the whole process of drafting the pattern, cutting the fabric, and sewing it up only took two hours or so. I've made several of those dresses for HG, and I have maybe four other patterns from Carla. If you ever want to learn to sew, I highly recommend her patterns. They are FULL of beginner-friendly advice and  tips, and they are extremely easy to follow.  As you can see from the pictures this dress is reversible with a button closure at the shoulder. I used three different fabrics for it from a line called Mimi by Moda, which I purchased at an actual fabric store back in January.


Isn't she beautiful?

Tuesday, March 4, 2014

The Most Invisible Zipper You've Ever...um, yeah


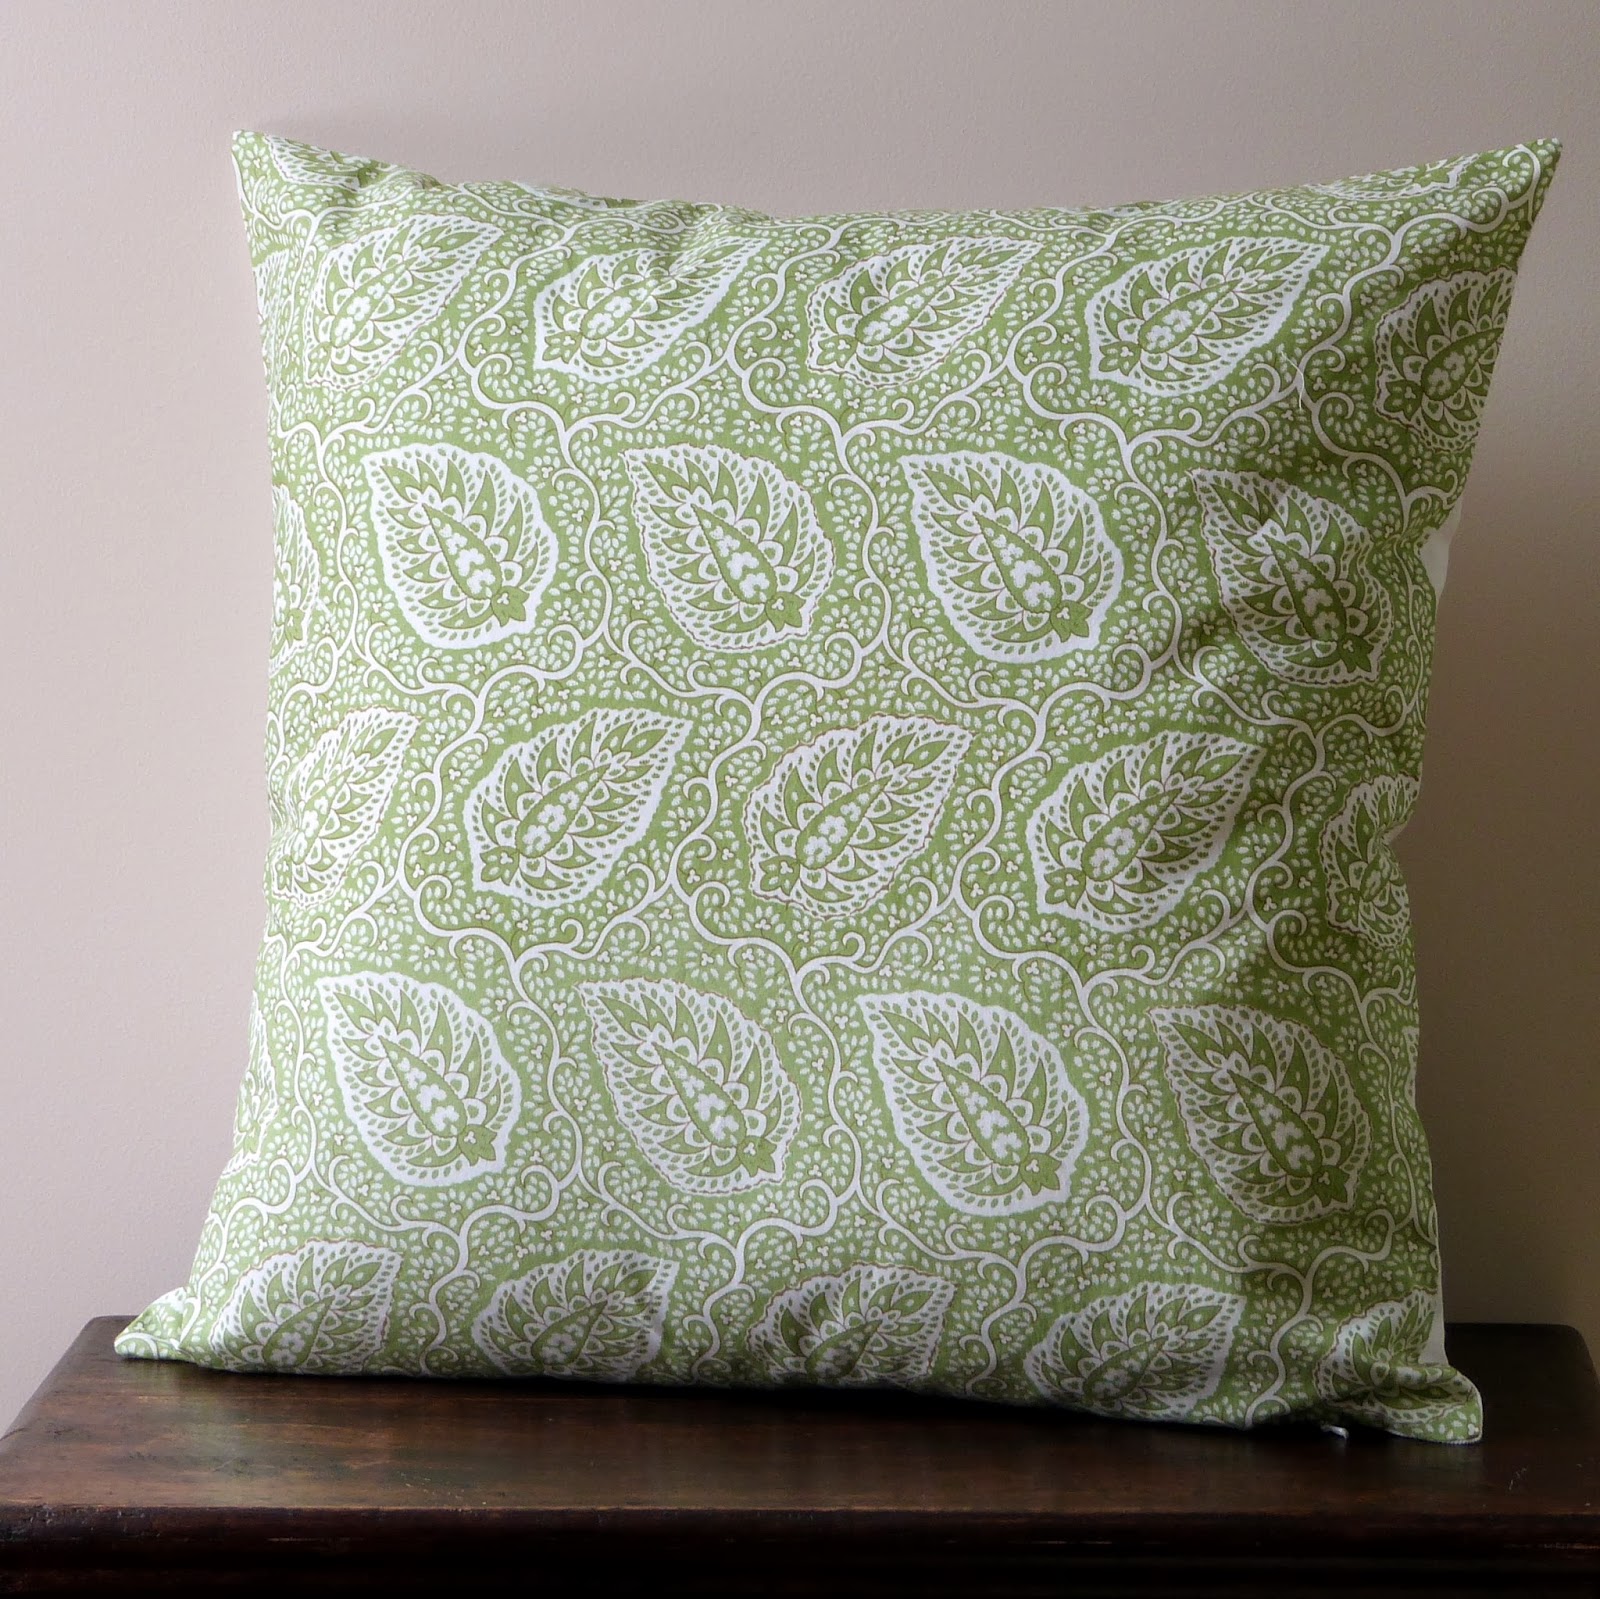
Yes, that's right folks. Here is an example of a perfectly invisible zipper which CANNOT BE SEEN AT ALL. I am sharing this with you because I only learned how to sew invisible zippers a couple of weeks ago. I would say I am getting pretty good. I also serged the seams on this baby and for the first time today TURNED CORNERS with the serger, ta da. I've promised more to come on the serger. Just want to take some more photos first.


If you're interested, the green and white fabric is called Oldwick and is by Sister Parish Designs. More about her in a future post.  For now you can just enjoy this gorgeous pillow. :)


Tuesday, February 25, 2014

Our Granola Recipe

Every few weeks in our house we make a big batch, sometimes two, of granola. I enjoy making this with HG because the quantities are so flexible. The granola is going to taste just as good if some of the oats end up on the floor instead of the mixing bowl and your sous chef eats a large amount of the coconut. And it's incredibly easy and fast. We eat ours on top of plain yogurt, which Martin often makes for us, with raisins or berries. A really delectable treat is Belgian waffles (again made by Martin) topped with yogurt, granola, and strawberries. Strawberry season is still a long way off around here, though.


HG wears one of my early sewing projects--an apron I made when she was about three. Even then she could put it on herself because of the elastic neck strap and the velcro waist strap. It still fits her just fine now that she is nearly six. When she was littler I think wearing the apron made her feel like a big girl and a big helper, but now I'm pretty certain she wears it because she knows it's practical. There are quite a number of chocolate stains on hers.


We mix our granola in a mixer with the bread hook, but you could use a really large bowl. I did that for years before we got our mixer; it works fine but it's harder and more time consuming. 


HG's apron fabric is from a designer called Unison and was handprinted at the textile mill near my house. I bought the pink fabric before I opened my Etsy shop, and I haven't seen it at the mill since. I really like it, but I don't have any more in that colorway. I have it in a forest green/mint green combo and in a light grey/red-brown combo, but no more pink. The child aprons in my shop are identical in style except they have a sweet little pocket in front.


After we mix all the ingredients we spread it out on a large sheet pan. And then we sweep up the floor under HG's stool!


Here is the recipe.

Mix thoroughly:
4 or 5 cups rolled oats
1 cup sesame seeds
1 cup wheat germ
1 cup sunflower seeds
1 cup unsweetened shredded coconut
1 cup chopped nuts (we use pecans, but some folks might like hazelnuts)
1/2 cup oil (we use coconut now but have used canola in the past)
1/2 cup liquid sweetener (honey, agave, and maple syrup are all good)

You could also try adding flax seeds or pumpkin seeds. I have made the recipe above, substituting the nuts for the pumpkin seeds so HG could take it to school.

Pour into a large sheet pan and bake for 1 hour in a 300 degree oven. Every 15 minutes, take the granola out and turn it with a large spatula. Let it cool before storing in an airtight container. Doesn't it look fantastic? Too bad you can't smell it!!


It make a great holiday gift in decorative containers and it's brilliant to serve at brunch--so easy. Enjoy!

Thursday, February 20, 2014

The Promise of Product

I am a product person. I have known this for quite some time. Exhaustively democratic meetings where people do not come to conclusions or develop action plans at the end make my skin crawl. I sometimes struggled with teaching what's called "the writing process" to middle schoolers not because I disagreed with the steps needed to develop good writing skills but because if the goal, in the end, is for students to learn to be good writers, I believe at some point they need to actually turn in polished pieces and stop working on them. Writing texts intended for publication, which I did at the Choices Program, was quite satisfying. Every few weeks there was a shiny new book in my hand that I had participated in creating. And I love lists! There is nothing better than a whole list of things crossed off! These days I even write down "take a shower" just so that I can cross it off later and enjoy the feeling of accomplishment. I know we're all supposed to live by the Life's a Journey, Not a Destination mantra, but truthfully that approach just doesn't work for me. Think about it, ruminate, consider, ask advice, do more research, but hey, at some point, whatever it is needs to get done. That's where I'm at.

Raising children is most definitely a process thing. If there are any grandparents out there who would like to chime in on when they thought, if ever, they were "done" with their parenting job, I'd be interested to hear it. My husband Martin and I have just embarked on a new discipline strategy with HG that will probably be a forever kind of thing, given the way it works (check out the books on the left column over there if you're interested in what we're doing). It's daunting and will likely be frustrating for me at times, but I'm most definitely willing to suffer some discomfort in order to give HG what she needs to grow into a confident, kind, inquisitive, and independent adult.

I'm now coming to the realization that sewing is a way for me to complete something regularly, and this is probably why I am so addicted. I can conceive of a new idea, turn it around in my head for a while, draft it out, choose fabrics, and then sew it up, and ta da! it's done! I even get to take a picture of it for all to see! Here are some pictures right now, in fact! First up is the bag I made for Christmas for HG's older sister, AM, which I thought would work for her knitting projects.


And here's the small comforter cover that was the first project I made with my new serger a month or so ago. This was a wonderful project to complete as it had been in the works for years. It took me forever to find the blue/green geometric fabric on the back to coordinate with the Sister Parish floral on the front. Now I sit under it most evenings on the couch after HG goes to bed and eat bon bons. Well, sometimes.


During periods of time when I can't sew much, such as school vacation (that's right now!) I really miss the satisfaction of being finished with something. I try to find peace in accomplishing those showers.

What about you? Process or Product?