Showing posts with label Etsy. Show all posts

Friday, October 10, 2014

Giving My Shop a Boost

Over the summer I took a class on Etsy called "Boost Your Shop." Actually, I took half of it. I still haven't finished the other half, though I think about completing it every day. I really do.

Our Nature Table. Just a nice photo. Not really related to the content of this post. 
How does one take a class on Etsy? Well, just like going to school, there are worksheets and readings. The difference is all the work is homework because it all takes place on your computer, at home. The class was supposed to take eight weeks. Each week Etsy sent out a worksheet and some directions for completing the lesson. I'm sure there was an opportunity for discussion and sharing and chatting with other people in the class, but I never looked into that and just did everything on my own.

The class was extremely useful, which is why I keep saying I'll finish it. It started with an evaluation of one's business brand. This was a super long lesson that I completed while flying overseas. I can't remember why, but I didn't have the computer, so I read the worksheets I had downloaded on my phone and hand wrote out my answers on the little sheets of recycled paper I had brought for HG to draw on. She listened to books instead.
No, also not related. 
The worksheet for that branding lesson began by asking us to write down the 20 words or phrases that describe our brand. "Brand" includes everything--items themselves, customer service, history of the business, everything about one's shop. Here's the list I came up with for Lila, in the order I wrote them down:
  1. detailed
  2. quick
  3. friendly
  4. unique fabric
  5. family-oriented
  6. durable
  7. beautiful
  8. well made
  9. contemporary
  10. not cutesy
  11. clever
  12. customizable
  13. researched/thoughtful
  14. clean lines
  15. simple
  16. upscale
  17. lasting design
  18. proven
  19. easy
  20. responsible
Coming up with 20 things was fairly difficult, actually, and I'm glad they asked for 20, since #17, "lasting design," has become a phrase I use quite a bit now in my descriptions. I'd love to know if you have other items you'd put on my list too! 

After a couple more exercises we were asked to write a "brand promise." We had to fill in the following sentence: 

"Every experience with Lila will convey ____________________ and ____________________ to my customers."  

What two phrases went in there for me? Lasting design and friendliness. So that's what I promise! 

All these little worksheets led up to the Big Job of rewriting our "Aboutthe Artist" pages on the Etsy website, which was Lesson 2. I had thought mine was pretty good before, but Lesson 1 of Boost Your Shop helped me discover some ways to improve it. I made all those changes, and you can read my revamped About page here. It took several drafts before I was happy enough to publish, but I think it was well worth the time as I now am able to articulate what values I hope to convey with my shop and even what products to offer. I've said before that the development of my shop has been so organic that these important questions--the ones most businesses address much earlier in their development--hadn't really been answered before. Doing just these first two lessons of Boost Your Shop gave Lila greater cohesion and much improved definition. 


The next two lessons involved tweaking copy and photographs, both of which, I believe, absolutely every shop out there can improve. I went through a couple dozen of my item descriptions and made small, useful changes which focussed mostly on the fabrics and the concept of lasting design. While I am quite comfortable with editing words, thanks to a life-long education in writing, taking and editing photos is often a struggle for me and my patience with myself in this area does wear thin. This is where I stopped working on the class, because the idea of trying to reshoot dozens of photographs just does not make me happy. I am continuously working on taking pictures, and my photos are miles better than they were when I first started, but I know there is plenty more I could do. The next lessons in the class have to do with social media, so I do hope to finish them. Maybe after the puppet theaters. But then there is a Halloween costume to make. And new wristlet clutches. And capes. And floor buckets!! It never ends!! 


Wednesday, October 8, 2014

Puppet Theaters Are Back!

In time for winter play in the northern hemisphere, I'm working on more puppet theaters. I have some new, phenomenal fabrics to work with, so keep your eyes peeled. Sister Parish curtains are next and an entire theater made with canvas from Hable Construction will follow.

Here is the first one, featuring that fantastic funky purple from Unison. You can find it here.


This theater is made from a purple and white ticking stripe. It's soft and very durable. The border around the stage has mitered corners, which are not that easy to do on inside corners, mind you. The bird applique at the bottom is super cute, I think. Other theaters have a fox looking up at the stage and I think I might tackle a hedgehog somewhere down the line. It was my husband HM who came up with the animal applique idea, so good for him. Here's a close up of the bird.


And a nice wide shot of the curtain area.


These theaters take a full seven hours to construct. While that is a long time, it is not nearly as long as the kids will spend playing with them! They can use their theaters with hand or finger puppets, or set them up as a stage for belting out tunes from Frozen. They even work as pretend storefronts! Don't you love toys that work for so many different activities?

Each theater comes in a drawstring bag for storage. I make those too. Oh, and I include the dowel as well that slides into place just below the window to stabilize the theater. OK, I'm off to work on the next one!

Monday, September 29, 2014

Making Spreadsheets is So Fun!

OK, not really. At all. But it is eye-opening and useful. Shall I tell you about it?

Why yes, I shall. While I feel like I got way behind in preparing for holiday orders and fairs this summer (yes, that kind of work starts in the summer), I was able to do several shop-related non-sewing projects that are normal business tasks but that I had not yet done in my, shall we say, organic business development. Etsy is fantastic at enabling people with not a lot of business expertise to open a shop. But if you want to actually turn a profit you do have to buckle down and do some nitty gritties eventually.

So I did two things this summer along those lines. First, I developed a file of spreadsheets which help me to better calculate my shop's prices for profit. Second, I actually did a sales matrix, listing the fabrics I've used on one axis and the products that have sold on the other. Both these tasks were time consuming, not exactly fun while I was doing them, but quite helpful afterward.

I read a huge number of blog posts, Etsy administration newsletters, and various websites to prepare for the pricing spreadsheets. I also had a very helpful conversation with an artist friend who used to be a buyer for a boutique in our town. Different people recommend different formulae for calculating the end price, most of which led to crazy outrageous prices for my very labor-intensive products. I came up with my own sensible numbers instead.

I tackled this issue in a pretty data-driven way. First off, I went and measured how much fabric and velcro and elastic and bias tape and even thread (OK, that one I estimated) go into each type of item I make. Yes, I measured with a tape measure. I made a sheet for each item and put in some calculations that I could cut and paste for each type of item. Every time an item uses X amount of mill fabric, that's X dollars worth. That was all very straightforward, though it was quite time consuming to go through all the measuring. I had to look up how much I pay for everything as well, from machine needles to interfacing to zipper pulls to fees that Etsy charges.

The other major element of pricing is labor. I started timing myself when I made things. Yes indeed I did. In my labor costs I included photography, product promotion, and product design as well as the time I spend actually constructing items. The end result of the pricing spreadsheets are product prices that are both fair and reasonable. I implemented them early in the summer. The new prices allow for some business growth, such as the purchase of a new sewing machine, as well as an occasional sale, promotion, or giveaway. They also accurately reflect the care I put into each item.

The other terrifically fun project (no, not really, not at all) was the sales-by-fabric matrix. While my shop is too small and carries too many one-of-a-kind items to benefit from a traditional inventory analysis, I looked through all my sales and figured out, through my matrix, how many of each type of item I've offered, how many have sold, and which fabrics have been most popular. The unexpected big sellers? While I was certain that aprons would top the list, I didn't realize that pencil rolls and capes were so successful. So on my to-do list very soon is to make more capes. But it was the top selling fabric that really surprised me. It turns out that my most popular fabric is the crazy purple and white one from Unison. Who knew? The next day I went to the mill and bought four more yards, because they still had some. Knowing that that pattern, and the three or four others that topped the list (all Hadley and Sister Parish prints), are so successful is helpful when deciding what to use next for whatever I'm making. For instance, I'm in the middle of sewing new snack bags with that purple fabric.
Here's that crazy Unison purple on a smock. 

Now my question is, should I make a cape in this fabric? I've held off in the past because it doesn't seem to me that it would work so well as a cape, but I'd love to hear any of your thoughts.

To be honest, making that matrix was so dreadful I don't think I will be keeping up with it. I might perhaps add to it every year or something, but having to record daily what I've posted in the shop and what has sold is way, way too time consuming. Since I am also the accountant, photographer, copy writer and copy editor, designer, marketing manager, shipping manager, customer service rep, purchaser, and oh, sewer, some tasks are just going to be left undone. 

Sunday, September 21, 2014

A Bicycle Bag


Last post you read about the cookies and tea bags MVB made for HG's birthday. For MVB's birthday, her mom commissioned me to make a handlebar bike bag. We talked for ages about the style MVB might like and what kinds of fabrics she would enjoy. Finally we settled on a pattern I bought on Etsy and some forest green fabric by Unison, complemented by a perfectly matching turquoise paisley which I found at my local fabric shop.


This is one snappy looking bag, I think. The straps on the back loop around the handlebars and are secured by D rings which you can see above. Inside the bag is a covered section, which is cinched closed by ribbon. The handles enable you to take the bag for a walk after you're done with your ride.

The pattern to make this bag was not easy to follow. While I could now make another one with greater ease, I found the directions for this to be completely non-intuitive. They also used an enormous amount of glue, which I thought was very weird for a sewing pattern. I chose to sew instead of glue. At several points I was sewing along only to realize I had done something backwards or inside out and the pieces I was making would not fit together. I even had to start over and cut out new fabric early on because it was faster to do that than to take out a huge number of incorrectly placed stitches. This was all before my new machine as well. My old machine is less precise and therefore some of the pieces did not come out as evenly as I would have hoped. But you probably can't tell from the photos, so that's good. Still, I'm not going to link to the pattern because I can't recommend it.

The bag is also a little floppier than I might have liked. I used the firmest interfacing (that's the stuff you put in between layers of fabric, usually to make them heftier or stronger) I am aware of, but it's still not a stiff bag.

If MVB's mom has a photo of the bag in use I could post it. Want to send me one? 

Tuesday, April 22, 2014

Snack Sacks and What to Put in 'Em

The new snack bags are in!  And, as promised, I’m including here a list of great ideas of what to put in them. Perhaps there are a few snack ideas listed that you haven’t thought of yet. If I’ve missed a favorite in your house, please share it in the comments!


I’d also like to point out that using these just for lunch would be so, so sad. AM uses hers for makeup organization in her purse, I’ve seen them used for carrying little toy cars around, and what a life saver they’d be for holding little game or puzzle pieces to bring on the plane, in the car, or just to have on hand in your purse for boring moments like waiting at restaurants. We use them to bring snacks on airplane rides and then reuse them at our destination rather than stopping to purchase expensive snacks all the time. Oh! I just thought of another great one! What about feminine products? So be sure to think outside the lunch box.


One more thing to point out. These bags are much more time consuming to make than you’d think. Sewing that pretty little border on, which I have to do twice for each one, is a slow process. It involves a set of tweezers. There are easier ways to make these bags, including just turning them inside out and sewing up the seams that way, but I really think there is something special about that border. Actually, I think it’s what makes the bags suitable to carry more than just lunch. And I also think there is value in having functional items look beautiful. Maybe it’s my German husband’s influence, or maybe it’s the Waldorf people I hang out with so much, but I do like that a lowly lunch sack can reach such heights if you want it to. Which I do.


My no-peanut lunch ideas list includes things you could put in your bags by themselves. I often bring four or five bags with me on an outing filled with different things, and none of them is a large “entree”-type item. I just nibble on all the small items and that works. It’s a super fast way to get out the door. So I haven’t listed all the millions of kinds of sandwiches or wraps you could make, but if you or your family has a favorite, do add it to the comments.


raw veggies
carrot, cucumber, kohlrabi, green beans, sugar & snap peas, sweet peppers, celery, radishes, grape tomatoes, broccoli, cauliflower, jicama 

Add dips in a separate little container: hummus, ranch dressing, tzatziki, almond butter, onion dip, salsa, or sunflower seed butter. These tend to make the veggies more appealing to many little people.

not-too-squishy fruits
apple slices, orange sections, grapes, dried fruit and raisins, dates

snacky-type things
cheerios and other cereals, sunflower seeds, trail mix, pepitas (pumpkin seeds), non-peanut nuts (macadamias, cashews, almonds, pistachios, pecans, walnuts), rice cakes, pretzels, pita chips, crackers (and cheese in a separate bag), bagel chips, pancakes (yes! pancakes!), potato or tortilla chips, kale chips, savory muffins

treats
sweet muffins, yogurt raisins, cookies


Summer camp is coming up for those who live in the Northern Hemisphere. Many day camps are requesting waste-free lunches, so snack bags are a real help there. Do let me know if you’d like to purchase several snack bag sets so I can offer you a volume discount.


Some feedback on my snack sacks from real people:
  • “I LOVE the bags and I use them a lot.”
  • “Items of the highest quality. Shipped quickly!”
  • “Beautiful fabric and quick shipping. Can't wait to use them!”
  • “Opening my package was like opening a special gift. The quality is fantastic and fabrics are even better in person. I love using these in my lunch and my daughter's lunch.”
  • “LOVE!”

Happy eating!


Monday, March 24, 2014

Our Newest Family Member!

Did I surprise you with that one? Introducing Baby, HG's new doll (yes, that is the name HG has given her). I have been thinking for years of getting her a soft, Waldorf-style doll and have held off for a number of reasons. First, she has quite a few hand-me-down dolls from her sister. Second, a handmade Waldorf doll is expensive. Third, I wasn't really even sure she was all that interested in dolls. Turns out to have been a very, very good purchase, and well-timed, too.


Waldorf dolls are entirely soft--there are no plastic or wooden parts. They are most often made of a cotton knit fabric for the skin and stuffed with wool. The softness gives them great huggability and also allows the heat of the child to transfer to them, giving them a warmth you can't find in a doll made of synthetic materials. Their features are ultra-simple so that the child can use his or her imagination and give whatever feelings she or he wants to the doll. The man who started Waldorf education, Rudolf Steiner, thought dolls should be even simpler. He suggested that you could form one out of a napkin and make dots with ink for eyes. But there are some ideas of Steiner's that I think we can just leave with him. Actually, that idea reminds me of my friend, a mom of one of HG's classmates, who suggested that for HG's birthday I give her doll an invisible friend. Just wrap up a box and put nothing in it. This is a lot funnier than the man who seriously suggested giving a wrinkled up napkin as a doll. But still, I'm not going to do it!

Anyway, I purchased HG's doll from WildMarigold, on Etsy. HG decided on the hair, skin, and eye color. Jennie, the owner, was most accommodating when HG changed her mind at the last minute about the eye color. As a sewer, I can tell you that the construction of HG's doll is both beautiful and durable. I was not about to tackle the challenge of making a doll myself (and you can, with kits or entirely on your own), and I'm very glad Jennie made her for us. She is much faster and much better at it than I would be!


HG has been carrying Baby around everywhere. She arrived just before HG succumbed to a terrible bout of flu and missed several days of school with a fever that went as high as 104. She calls her the best doll in the world. But until today Baby hasn't had any clothes. While Jenny at WildMarigold makes clothes too, I thought I could figure that part out myself. For this first dress I adapted a pattern from ScientificSeamstress. I just used the construction method from a girls' dress pattern I bought from her (her name is Carla) and drew out a pattern free-hand that was much smaller. It took a few drawings before I had something that would fit Baby, but still the whole process of drafting the pattern, cutting the fabric, and sewing it up only took two hours or so. I've made several of those dresses for HG, and I have maybe four other patterns from Carla. If you ever want to learn to sew, I highly recommend her patterns. They are FULL of beginner-friendly advice and  tips, and they are extremely easy to follow.  As you can see from the pictures this dress is reversible with a button closure at the shoulder. I used three different fabrics for it from a line called Mimi by Moda, which I purchased at an actual fabric store back in January.


Isn't she beautiful?

Friday, March 21, 2014

The Origins of "Lila"


I learned some fascinating things this week about the word "Lila" from, of all people, my mother's yoga teacher. She tells me that he (the teacher) is an Iowan whose missionary parents, Presbyterians, raised him in Pakistan. Interesting. But I have never met him so can't really go into that. He and my mom were apparently discussing my shop and he went and looked up the origins of "lila." In Sanskrit, where it is also spelled "leela," it means "pastime," or "play." I find this fascinating because of course I started sewing as a pastime and spend a great deal of my work day "playing" with fabric and design. Then there are all those children out there playing with Lila products!

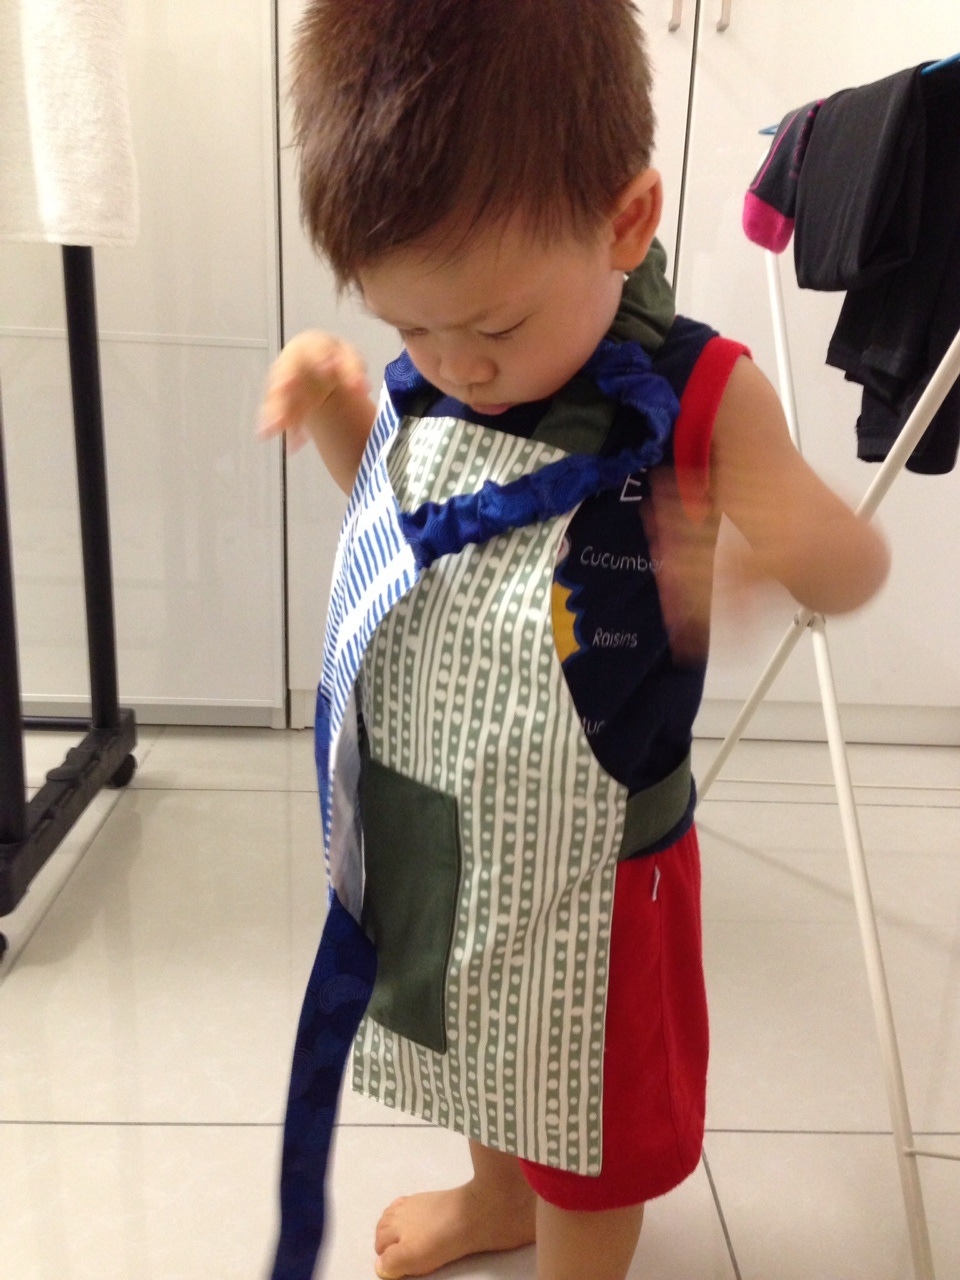
One of my customers posted this of her son trying to put on two Lila toddler aprons at a time!
There are some more complex meanings and associations with "lila" in Hinduism, which, I admit, I am at a loss to understand, but the yoga teacher's research also determined that the the word "lilac" is derived from "lila," which itself also has Sanskrit origins in the word for dark blue (still with me?), which brings me to...

Eggplant purple smock with fabric from Unison

...the reason I named my shop "Lila." Our family is bilingual. We speak German and English at home. HG's English is better than her German at the moment, but one of her first words was "lila," which is the German word for purple. It was (and might still be) her favorite color. OK, maybe that's not earth-shattering, but I think it's cute.

But wait, there's more!  In Arabic, it means "night" or "dark," and similarly in Hebrew. And there are all kinds of famous people named Lila, there are films and books and art and albums bearing the name, and, if you expand your search to include spellings like "Leila" and "Layla," you will soon become overwhelmed with the references to dark beauty, various mythic characters, and ancient epic poetry.

So there you have it! All kinds of neat linguistic history in my shop's name. And I didn't know any of it when I first opened. 

Sunday, March 2, 2014

"I am DONE with King Winter!"


HG's snowmen, sporting handmade hats and scarves.
So said HG this morning when we noticed the first snow flurries of our latest storm. While some of you are starting to enjoy little pieces of spring sunshine, and others across the world might be enjoying autumn, we here in New England are having just more and more winter. At our house there's been quite a lot of snow shoveling and days off from school, and plenty of hot chocolate and weekend afternoons inside by the fire, plus a few good sledding days. These activities always seem cozy and fun at the beginning of winter. Here's some sledding we did a couple of weeks ago.


At this stage many of us are pretty weary,  including even children! So here's a few ways to brighten your outlook and bring some color to the season.

During a rare day with bare ground HG gathered some sticks from the yard and brought them inside. She had the idea to cut out some stars and moons and also to tie little pieces of colored ribbon to her branches and put the decoration in a vase. We used her painting paper from school to make the stars. You can read more about Waldorf kindergarten wet-on-wet painting here.


The colored jars are lanterns, also made at school. They have a little tea light inside them and wire handles.


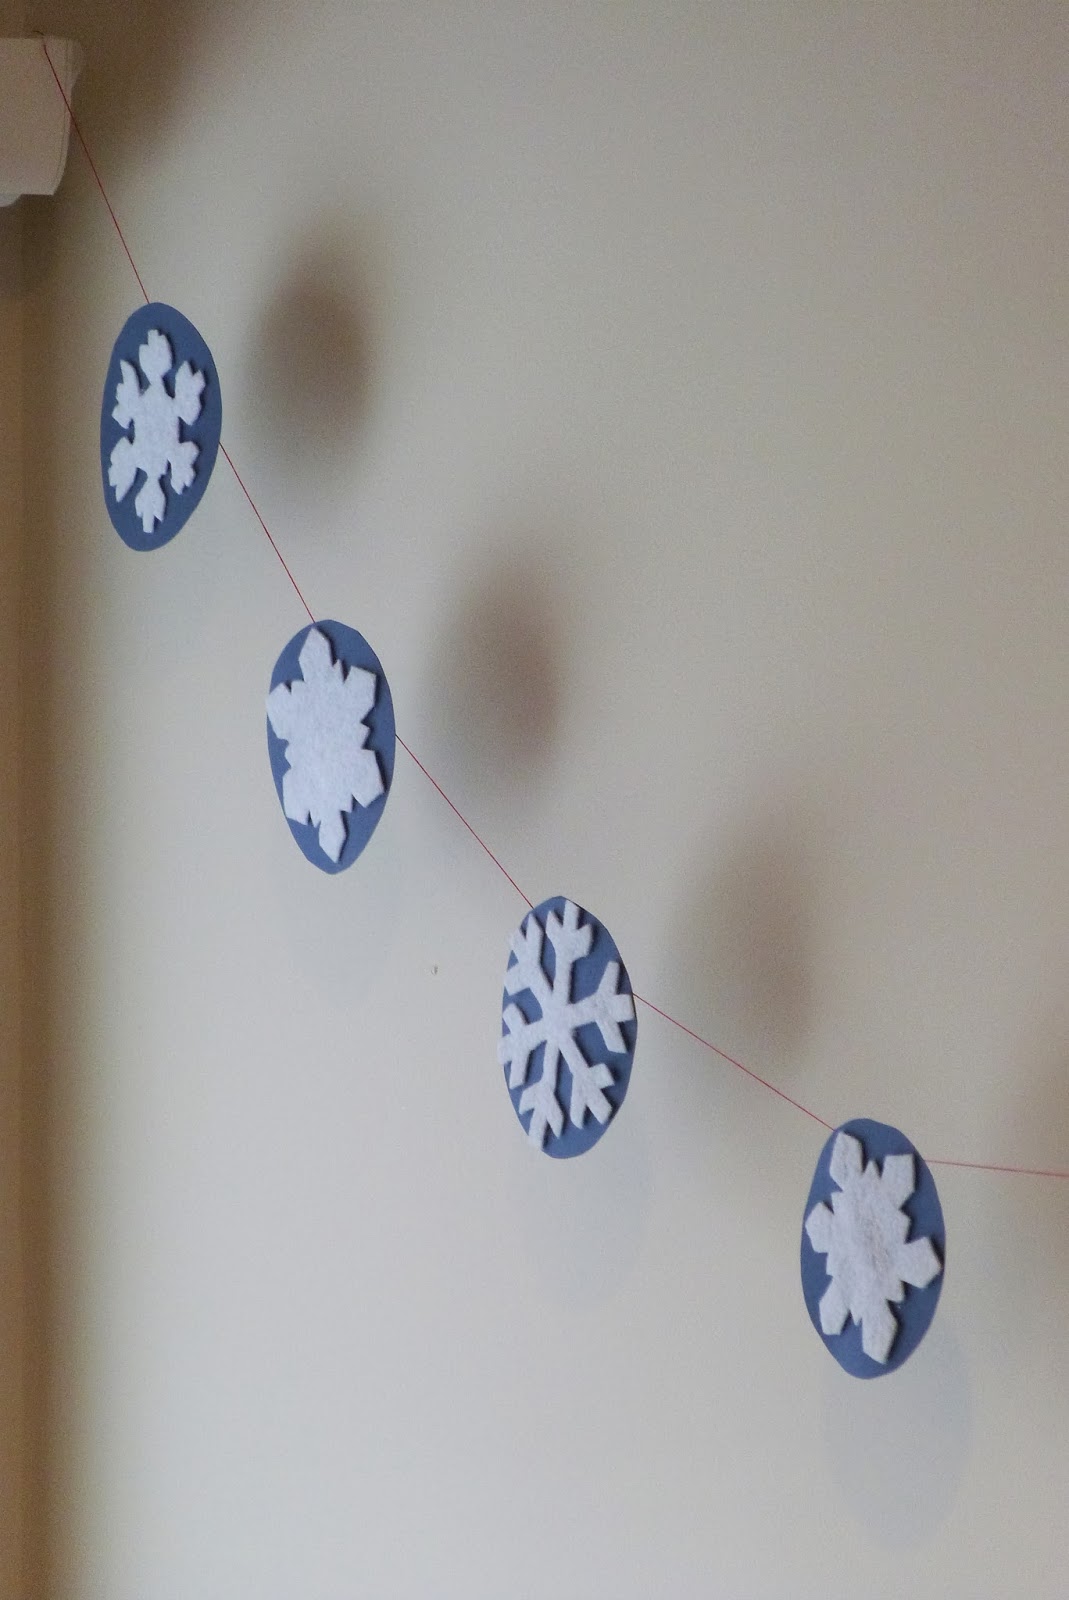
I made a snowflake garland out of glittery white eco-felt and blue card stock and just hung it with thread. No, I didn't design the snowflakes myself as I can't draw. At all. I traced them, which, if you're wondering, still counts as being creative in my book.


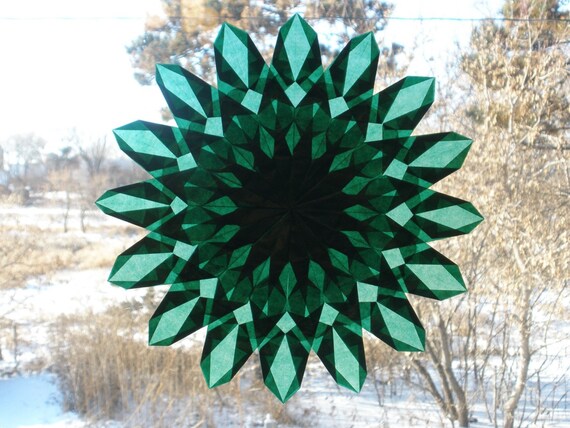
Lastly, HG brought home a simple Waldorf window star she made at school.


These are really beautiful decorations made from thick tissue paper called kite paper, which can be purchased easily online. There are lot of tutorials out there too and some books as well. If you're not really interested in making the stars yourself, there are some lovely, complicated ones from people on the Waldorf on Etsy team. Here are two of them.

A star from harvestmoonbyhand

One from La Lutine.

So if King Winter is still hanging around your part of the world, try out some of these simple activities to add some color!


Tuesday, February 25, 2014

Our Granola Recipe

Every few weeks in our house we make a big batch, sometimes two, of granola. I enjoy making this with HG because the quantities are so flexible. The granola is going to taste just as good if some of the oats end up on the floor instead of the mixing bowl and your sous chef eats a large amount of the coconut. And it's incredibly easy and fast. We eat ours on top of plain yogurt, which Martin often makes for us, with raisins or berries. A really delectable treat is Belgian waffles (again made by Martin) topped with yogurt, granola, and strawberries. Strawberry season is still a long way off around here, though.


HG wears one of my early sewing projects--an apron I made when she was about three. Even then she could put it on herself because of the elastic neck strap and the velcro waist strap. It still fits her just fine now that she is nearly six. When she was littler I think wearing the apron made her feel like a big girl and a big helper, but now I'm pretty certain she wears it because she knows it's practical. There are quite a number of chocolate stains on hers.


We mix our granola in a mixer with the bread hook, but you could use a really large bowl. I did that for years before we got our mixer; it works fine but it's harder and more time consuming. 


HG's apron fabric is from a designer called Unison and was handprinted at the textile mill near my house. I bought the pink fabric before I opened my Etsy shop, and I haven't seen it at the mill since. I really like it, but I don't have any more in that colorway. I have it in a forest green/mint green combo and in a light grey/red-brown combo, but no more pink. The child aprons in my shop are identical in style except they have a sweet little pocket in front.


After we mix all the ingredients we spread it out on a large sheet pan. And then we sweep up the floor under HG's stool!


Here is the recipe.

Mix thoroughly:
4 or 5 cups rolled oats
1 cup sesame seeds
1 cup wheat germ
1 cup sunflower seeds
1 cup unsweetened shredded coconut
1 cup chopped nuts (we use pecans, but some folks might like hazelnuts)
1/2 cup oil (we use coconut now but have used canola in the past)
1/2 cup liquid sweetener (honey, agave, and maple syrup are all good)

You could also try adding flax seeds or pumpkin seeds. I have made the recipe above, substituting the nuts for the pumpkin seeds so HG could take it to school.

Pour into a large sheet pan and bake for 1 hour in a 300 degree oven. Every 15 minutes, take the granola out and turn it with a large spatula. Let it cool before storing in an airtight container. Doesn't it look fantastic? Too bad you can't smell it!!


It make a great holiday gift in decorative containers and it's brilliant to serve at brunch--so easy. Enjoy!

Thursday, February 6, 2014

Welcome!

Hi! And welcome to Lila Creates. I am Sarah, a self-taught sewer and owner of the Etsy shop LilaKids. In my previous life I was a teacher, a teacher trainer, and curriculum writer, but after my daughter was born I took up sewing. I don't really know why I turned to sewing, but I find it therapeutic and I love the feeling of taking something flat and turning it into something beautiful and useful. 

I've started this blog as a way to communicate with customers and potential customers about my work. When I purchase things from artisans I always appreciate knowing a little more about the person who made the item and the story behind it. If I wasn't that interested I could always go to some big box store and get something anonymous, right? But the heritage of the item, even if it was just made yesterday, adds value to it and is fun to learn about. So this is where I'll be able to tell more about how I decide to make the items in my shop, how people use them, and I'll be able to share more about me. 

I'm also really looking forward to the conversations blogging enables. I would LOVE to hear from people about how they're using Lila products, ideas you have for improving them or new items to make, or any tidbits you'd like to share about your life and any creative adventures you may have. 

So today I'm going to share with you some photos of my studio. Yikes! It's not always very neat, and I didn't tidy it up before taking these because I thought you'd rather see the real me, not some House Beautiful version. So here's photo one, of my beloved machines: 

my laptop, my standard sewing machine, and my new serger
My camera is missing from the photo but that's an important machine for me too. In the back are some artworks from my daughter, who'll be known as HG here. Way off on the bottom right you see my reading glasses. Those became necessary last year, to my dismay. 

the needle and thread drawer
Above is the drawer that holds my needles and threads. Different sewing projects need different kinds of threads and machine needles. There are also a bunch of sewing machine "feet" which make it possible to do different kinds of things, like add zippers to things. Let me know if you'd like a tour of the specifics in this drawer and what everything does! 

here is what I mean by "it's not House Beautiful"
Next up is the natural state of my unironed fabric. It looks dreadful. Or maybe we should say it's just waiting to fulfill its destiny. That sounds a little more charitable. At one point I had an actual system, where linens were on bottom and solid cottons on top, but clearly that is no longer the case. Below is the ironed fabric, all nicely hanging. I've had to triple and quadruple up the yardage since I don't have enough space in the closet for everything to have its own hanger. 


All fabric needs to be prewashed and ironed before it can be cut and sewn. This can be a really lengthy process, actually. Sometimes I wash linen several times to get it softer before I work with it. And ironing huge long pieces of fabric is not easy. 

Finally, a nice photo of my belts all in a row. I like looking at these beauties all together. They don't sell well in the shop, and I haven't figured out why. I've tried them on both myself and HG and they work fantastic. Mine is an adult version of the pink one at the end, and hers is the one with the green circles. They're easy to put on, pretty, really sturdy but also flexible.... Plus, I toss them in the wash when they get a little dingy looking. If anyone has any ideas about either design or marketing improvements I could make to help them sell better, I'm all ears!

 LilaKids Belts

I noticed I forgot to take a photo of my cutting table. I'll have to do another post about the rest of my studio. Stay tuned! And in the meantime, please let me know what kinds of things you'd like to me to write about in the future! Thanks for reading!