Showing posts with label serger. Show all posts

Friday, April 11, 2014

This is Not a Duck


Ah, but it is duck cloth. Sorry, Magritte. And it's what my new snack bags will have as their lining. This is 100% organic undyed cotton duck cloth. The cotton was grown and woven into cloth in India. I bought it from a US company that sells only organic fabrics.

What is duck cloth, you ask? Cloth for ducks? Um, no. I did some research. Turns out "duck" cloth was originally a linen fabric called "doek" in Dutch, which refers to a heavyweight canvas once used as sailors' clothing. Those Dutch were always travelling the world by ship, conquering lands, and needing good outerwear, but that's another story. Duck cloth is strong stuff. It has a special weave and uses thick threads in the weaving process. The heavier weight varieties have been used in hammocks, sails, tents, and sand bags, while a lighter weight version, which is what I bought, is perfect for snack bags! Besides being tough and rip-resistant, it also (drumroll, please) resists water just a bit! In the photo below you can see some water droplets beading up on it. I took the photo myself after splattering the water, so it was several seconds between when I splattered the water and when I focused the camera and took the shot.


The combination of the strength of the fabric, the fact that it is organic, and this slight water resistance is what drove me to switch from using the uncoated nylon I had been using previously in the snack bags. I am very, very happy not to be working with the nylon anymore. It worked well enough in the bags, but over time was prone to ripping, and sewing with it is a big pain. It's slippery, you can't iron it properly because it will melt, can't put pins in it because nylon doesn't recover, blah blah blah. The fact that our food can now all be protected by organic material is also a huge plus. And the new bags feel soft but substantial.

Originally I planned to use only the serger to construct the bags rather than using that nice strip of white binding you're familiar with:

Old style bag with nylon inside and pretty white binding along edges.
I spent the better part of two whole work days refining the new snack bags on the serger, trying to master that lovely curve around the front of the envelope, getting the threads to be just the right length and width on both the front and back of the fabric, and experimenting with different snack bag shapes. I used more duck cloth and more beautiful mill fabric than I wanted in this effort. It was not fun and I nearly cried with frustration. The serger was not being nice to me. Or rather, my inexperience with it was showing. It kept getting tangled and needing rethreading, and it made some very unhappy noises. Once it broke a needle clean off in the middle. Good thing I was wearing my glasses!

Practicing curves on some random linen.
First attempts at bags with serged edges. nope, ugly!

Oh my gosh, no.

Finally I got the machine figured out and was able to sew some decent seams. I did come up with three different bags that I was mostly happy with but which did not excite me. They were serviceable and well made but I found I missed the very clean look of that white binding from the old style. So I went back to using the binding and sewing that on with the conventional sewing machine, which has always been difficult because of the thickness of the fabrics. Now the fabrics are even thicker and my machine is really showing its age, but I find that trim look just cannot be replicated with even the most perfect serger stitches. It does take longer to sew the binding on than to use the serger, but I find value in a functional object that is also beautiful and I hope you do too.

One serviceable bag. But see the little fabric bits poking out? I don't like 'em!!
So this is where we are: new snack bags with 100% organic cotton lining, bound securely with bias binding, with beautiful hand screened fabrics on the outside. I will make several sets before posting them all in  my Etsy shop. When I've got them ready for sale I will let you know and I will give you a pile of ideas of what to put in them. I know I am always looking for new things to send to school, and I don't know any parents who aren't.
Ahhhh, now this is more like it!!


Happy sailing!

Saturday, March 8, 2014

So, How's It Going with that Serger?

It's taken me quite a while to get up the nerve to write about my not-so-new-anymore serger. The thing is that the machine is still rawther scary. Here's why: it's incredibly fast and mistakes are difficult if not impossible to fix. I feel like I'm riding a very excited race horse who doesn't respond well to my commands. It has a tendency to throw me off.

BUT, when I do get a particular part of it nailed down, it does wonders. Because it's fast, things get sewn much more quickly. Because it's a serger, it makes super duper strong seams. Because it's a serger, it cuts the fabric in a nice straight line for me, as long as I can put it through evenly while the thing is roaring to the finish line. And because it's a serger, it can do several things my conventional sewing machine just can't.

So let's look at the thing.

Here it is with all the doors open.
OK, so first off, here are some major differences between a serger and a conventional sewing machine. 1. A serger has multiple threads. Mine can be using as many as 4 at a time. 2. A serger has a knife which cuts the fabric as it enters the sewing area. Right in the top middle of this picture is a flat metal piece pointing downwards with a black screw at the top of it. That is the upper blade. You can't see the lower one in this top photo. the two together work like scissors. In the bottom photo you can see the top blade pointing down in the top left side of the picture, and the bottom blade, also a long flat metal piece and covered with lint, is on the far bottom left of the photo, pointing to about one o'clock.


Don't be concerned about the dust!  Because it cuts the fabric it gets linty immediately.
I clean it after every couple of projects, but it's never perfect.
Yes, the machine actually cuts the fabric before it sews it. There are lots of 1/4 inch or so wide strips of fabric in my trash can. This is one reason why mistakes are so dangerous. You can't go back and glue the cut fabric back on. If you swerve very slightly or stop paying attention for a fraction of a second or look at another part of the machine while feeding the fabric, you will make it cut the wrong width off and you will end up with wonky bits instead of nice straight lines. The fact that it isn't easy to make the machine go at a leisurely pace means you really, really, have to pay attention. And by "you" I mean "me."

So, next up. Those threads. In the picture above you can see all four of them, actually, looking at points like they're all tangled up. They are not. Two of the threads make straight stitches with needles just like a sewing machine. Two of them are called "loopers" because they loop around the fabric on that cut edge the machine makes to secure the fabric and prevent fraying.


Each thread follows a special path and must be inserted in a special order. You can see that my machine has colored dots to tell you where to put each thread. Some machines actually thread themselves for you with different technologies. I didn't buy one of those because a) they cost twice as much, and b) I was pretty sure I could figure out the threading myself and wasn't going to be changing threads too often, and c) my experience with my conventional sewing machine led me to want a solid, "just bloody sew gosh darn it" (yes, in real life I use other words when annoyed at my sewing machine) serger, not a serger with gimmicks. This does mean that when I need to thread the machine I must locate my reading glasses and the tweezers and the directions and get to work. The tweezers actually come with the machine. The glasses don't, though. It only takes five minutes but I am not adept at it yet. I should probably also avoid caffeine so my hands don't shake. :) The hardest part for me is threading the two needles. They are right next to each other and it's just hard to reach in back to pull the thread through.


Now, below is a photo of a lovely four-thread seam--or two of them, actually. These are going to be snack sacks. On the piece with the nylon on top you can easily see that there are two sets of straight stitches running parallel to the edge of the fabric. That is the edge that was cut with the knife. Then there are these loopy threads that curve over the edge and get sewn down by the straight stitches. Those are the loopers. In the photo with the colored dots above the two threads you see are the two loopers. 


This is what makes serger seams so strong--there are several threads going both along and over the edge of a seam. If you have a look at a tee shirt or the cuff of some pants you will see two sets of stitches running parallel to the edge of the garment and then, if you turn it over and look inside, you'll see those loops running between the two straight stitches. That is the same idea, though my machine can't actually make those kinds of seams (you need what's called an "coverstitcher" which requires at least five threads.) You don't have to sew with four threads all the time. You can sew with three of them--one needle and two loopers--or even just two of them. In the photo below you can see a "rolled hem" seam, made with three threads. See how completely different it looks from the seams above?


To make this seam I've adjusted three things, in addition to taking out one of the needles. First, I enabled the fabric to roll a teeny weeny bit onto itself after it is cut and before it is sewn. There is a sliding knob that allows that. Second, I turned another knob to adjust how wide the stitch would be. Third, I adjusted what is called the tension of the threads. In the first photo of this post you can see four knobs with numbers on them. Those adjust how tightly each thread is held by the machine as the fabric goes through it. If I tighten one of the loopers way up, the loop will loop all the way on one side of the fabric, securing that teeny folded edge in place. See how the edge of the green napkin above is rolled to the back side of the fabric? The whole effect, on these napkins anyway, is something very neat and once again very strong. You can't do either of the seams I've shown here with a regular machine, though of course a serger can't do everything a regular machine can either. For many projects I use both machines at different points. 

For instance, a seger is great with knits--those are the fabrics that make teeshirts and and other stretchy or somewhat stretchy clothes. I made HG a pair leggings in no time at all with the serger, whereas when I used to make them with my sewing machine they took longer and the seams were never really strong enough--they kept splitting since the stitches are not well designed for stretching with the fabric. At least not for the amount of stretching HG does with her clothes. When I made these leggings I serged the seams but I made the waistband casing for the elastic with the regular machine. It is possible to do that with the serger but I don't know how yet.

You are looking at the front of the leggings, inside out.
The main thing I'm struggling with now, if you haven't already figured it out, is the speed this thing has. The foot pedal, which works like your car accelerator to make the machine go, just doesn't really do slow, at least I have a very hard time getting it to go slowly. I have taken to working in my socks so I can feel better what I'm doing, but I'm still bad at making curves. I can do straight lines very well now, but my curves are not ready for prime time. I was hoping to be able to toss out a whole lot of snack sacks for my shop, but the tops of those are one nice big curve, and the first time I tried it I completely ruined it 'cause I thought it would be easy, so I need a lot more practice. I should have taken a photo of the ruined snack sack before I threw it out. It was pretty awful. You would have laughed. I did not.

So that's the basics, and it was still a long post. I'd love to hear from you about anything else you'd like to know about the serger. If you ask, I will write it! 


Tuesday, March 4, 2014

The Most Invisible Zipper You've Ever...um, yeah


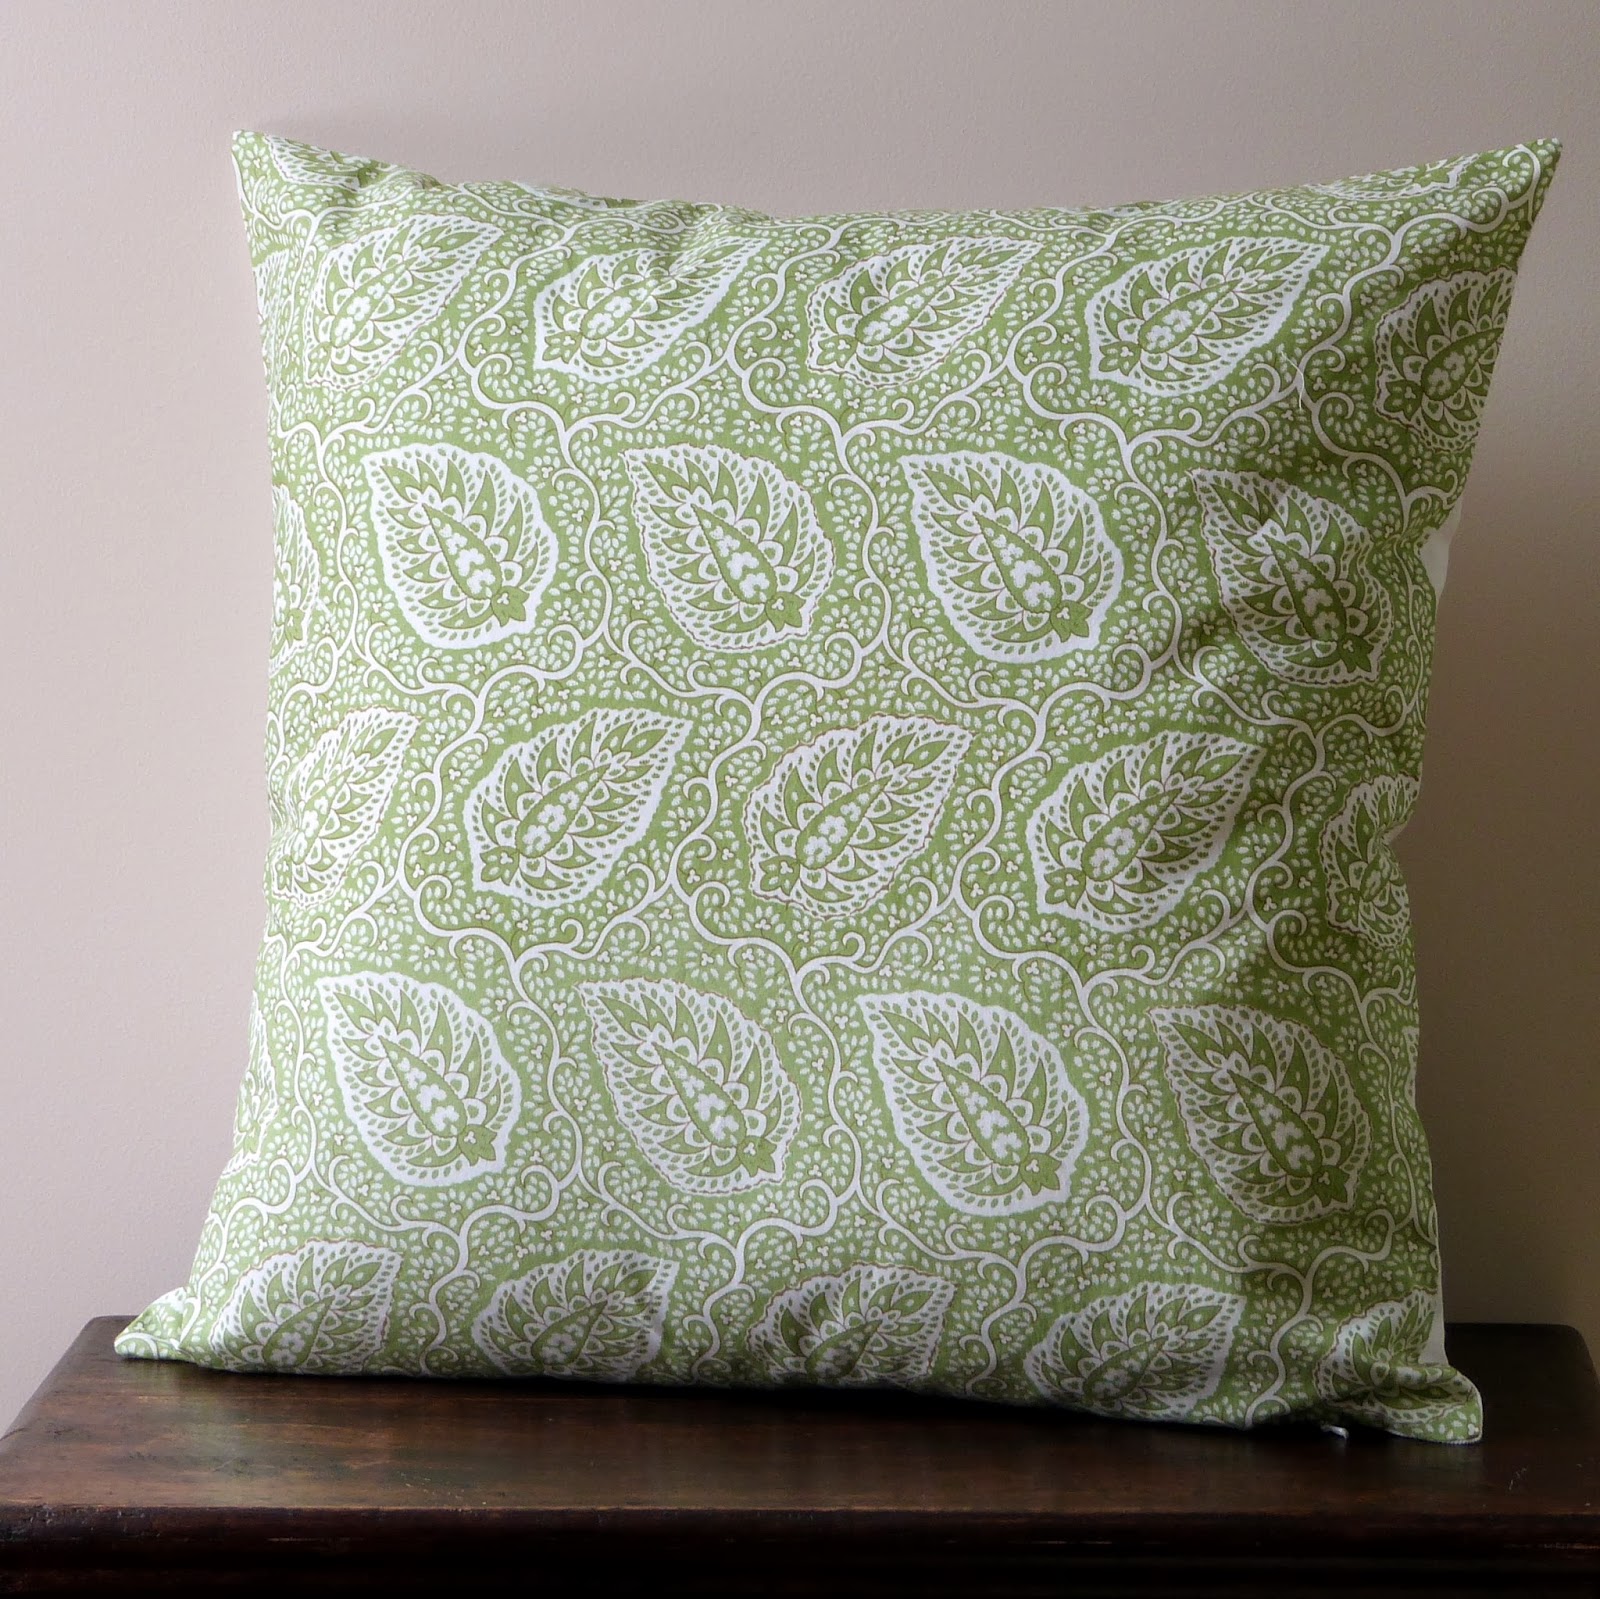
Yes, that's right folks. Here is an example of a perfectly invisible zipper which CANNOT BE SEEN AT ALL. I am sharing this with you because I only learned how to sew invisible zippers a couple of weeks ago. I would say I am getting pretty good. I also serged the seams on this baby and for the first time today TURNED CORNERS with the serger, ta da. I've promised more to come on the serger. Just want to take some more photos first.


If you're interested, the green and white fabric is called Oldwick and is by Sister Parish Designs. More about her in a future post.  For now you can just enjoy this gorgeous pillow. :)


Thursday, February 20, 2014

The Promise of Product

I am a product person. I have known this for quite some time. Exhaustively democratic meetings where people do not come to conclusions or develop action plans at the end make my skin crawl. I sometimes struggled with teaching what's called "the writing process" to middle schoolers not because I disagreed with the steps needed to develop good writing skills but because if the goal, in the end, is for students to learn to be good writers, I believe at some point they need to actually turn in polished pieces and stop working on them. Writing texts intended for publication, which I did at the Choices Program, was quite satisfying. Every few weeks there was a shiny new book in my hand that I had participated in creating. And I love lists! There is nothing better than a whole list of things crossed off! These days I even write down "take a shower" just so that I can cross it off later and enjoy the feeling of accomplishment. I know we're all supposed to live by the Life's a Journey, Not a Destination mantra, but truthfully that approach just doesn't work for me. Think about it, ruminate, consider, ask advice, do more research, but hey, at some point, whatever it is needs to get done. That's where I'm at.

Raising children is most definitely a process thing. If there are any grandparents out there who would like to chime in on when they thought, if ever, they were "done" with their parenting job, I'd be interested to hear it. My husband Martin and I have just embarked on a new discipline strategy with HG that will probably be a forever kind of thing, given the way it works (check out the books on the left column over there if you're interested in what we're doing). It's daunting and will likely be frustrating for me at times, but I'm most definitely willing to suffer some discomfort in order to give HG what she needs to grow into a confident, kind, inquisitive, and independent adult.

I'm now coming to the realization that sewing is a way for me to complete something regularly, and this is probably why I am so addicted. I can conceive of a new idea, turn it around in my head for a while, draft it out, choose fabrics, and then sew it up, and ta da! it's done! I even get to take a picture of it for all to see! Here are some pictures right now, in fact! First up is the bag I made for Christmas for HG's older sister, AM, which I thought would work for her knitting projects.


And here's the small comforter cover that was the first project I made with my new serger a month or so ago. This was a wonderful project to complete as it had been in the works for years. It took me forever to find the blue/green geometric fabric on the back to coordinate with the Sister Parish floral on the front. Now I sit under it most evenings on the couch after HG goes to bed and eat bon bons. Well, sometimes.


During periods of time when I can't sew much, such as school vacation (that's right now!) I really miss the satisfaction of being finished with something. I try to find peace in accomplishing those showers.

What about you? Process or Product? 

Thursday, February 6, 2014

Welcome!

Hi! And welcome to Lila Creates. I am Sarah, a self-taught sewer and owner of the Etsy shop LilaKids. In my previous life I was a teacher, a teacher trainer, and curriculum writer, but after my daughter was born I took up sewing. I don't really know why I turned to sewing, but I find it therapeutic and I love the feeling of taking something flat and turning it into something beautiful and useful. 

I've started this blog as a way to communicate with customers and potential customers about my work. When I purchase things from artisans I always appreciate knowing a little more about the person who made the item and the story behind it. If I wasn't that interested I could always go to some big box store and get something anonymous, right? But the heritage of the item, even if it was just made yesterday, adds value to it and is fun to learn about. So this is where I'll be able to tell more about how I decide to make the items in my shop, how people use them, and I'll be able to share more about me. 

I'm also really looking forward to the conversations blogging enables. I would LOVE to hear from people about how they're using Lila products, ideas you have for improving them or new items to make, or any tidbits you'd like to share about your life and any creative adventures you may have. 

So today I'm going to share with you some photos of my studio. Yikes! It's not always very neat, and I didn't tidy it up before taking these because I thought you'd rather see the real me, not some House Beautiful version. So here's photo one, of my beloved machines: 

my laptop, my standard sewing machine, and my new serger
My camera is missing from the photo but that's an important machine for me too. In the back are some artworks from my daughter, who'll be known as HG here. Way off on the bottom right you see my reading glasses. Those became necessary last year, to my dismay. 

the needle and thread drawer
Above is the drawer that holds my needles and threads. Different sewing projects need different kinds of threads and machine needles. There are also a bunch of sewing machine "feet" which make it possible to do different kinds of things, like add zippers to things. Let me know if you'd like a tour of the specifics in this drawer and what everything does! 

here is what I mean by "it's not House Beautiful"
Next up is the natural state of my unironed fabric. It looks dreadful. Or maybe we should say it's just waiting to fulfill its destiny. That sounds a little more charitable. At one point I had an actual system, where linens were on bottom and solid cottons on top, but clearly that is no longer the case. Below is the ironed fabric, all nicely hanging. I've had to triple and quadruple up the yardage since I don't have enough space in the closet for everything to have its own hanger. 


All fabric needs to be prewashed and ironed before it can be cut and sewn. This can be a really lengthy process, actually. Sometimes I wash linen several times to get it softer before I work with it. And ironing huge long pieces of fabric is not easy. 

Finally, a nice photo of my belts all in a row. I like looking at these beauties all together. They don't sell well in the shop, and I haven't figured out why. I've tried them on both myself and HG and they work fantastic. Mine is an adult version of the pink one at the end, and hers is the one with the green circles. They're easy to put on, pretty, really sturdy but also flexible.... Plus, I toss them in the wash when they get a little dingy looking. If anyone has any ideas about either design or marketing improvements I could make to help them sell better, I'm all ears!

 LilaKids Belts

I noticed I forgot to take a photo of my cutting table. I'll have to do another post about the rest of my studio. Stay tuned! And in the meantime, please let me know what kinds of things you'd like to me to write about in the future! Thanks for reading!