Monday, March 31, 2014

Interested in Sewing? Hope You Like Ironing!

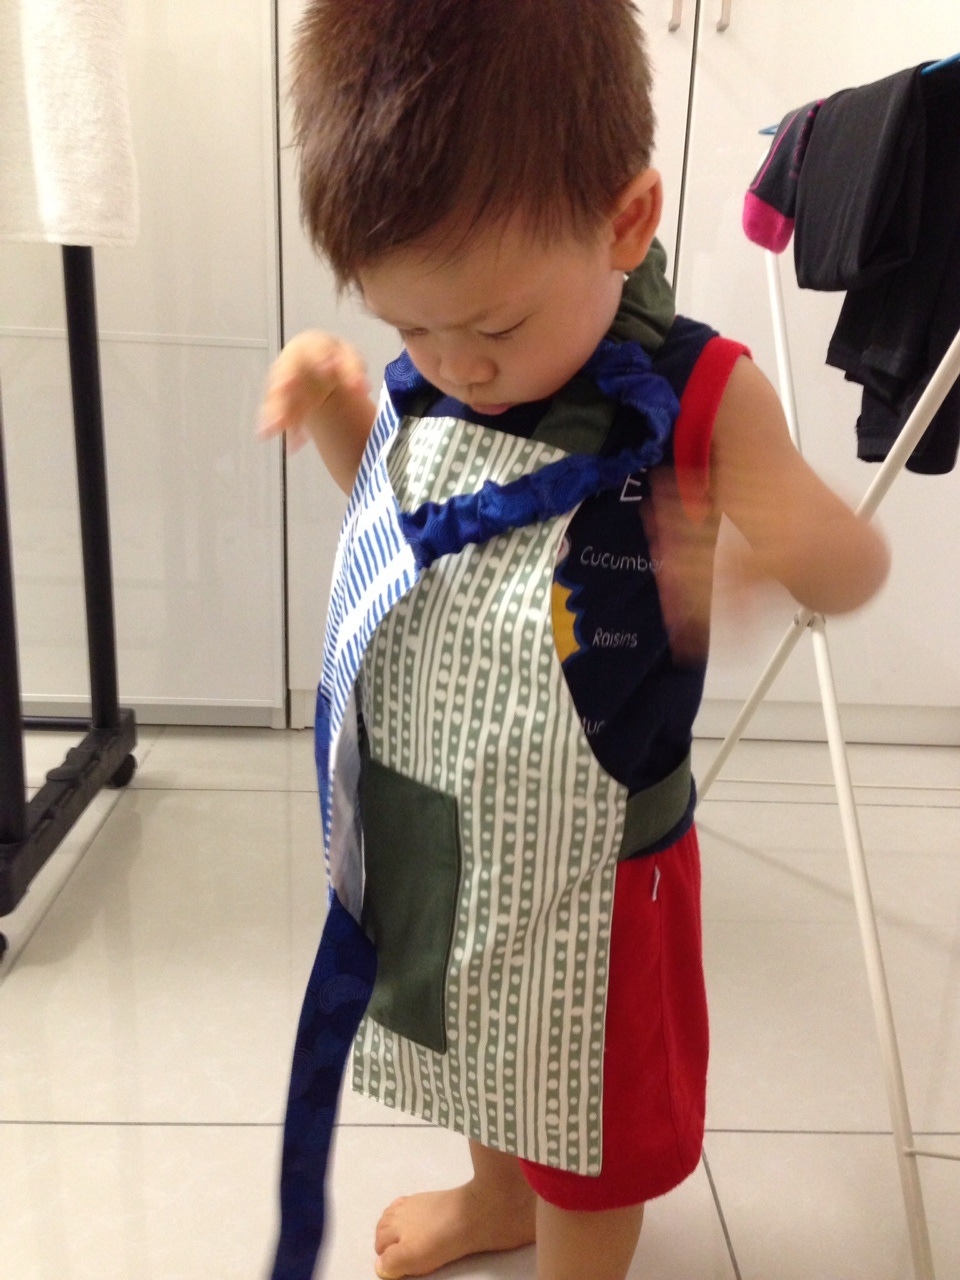
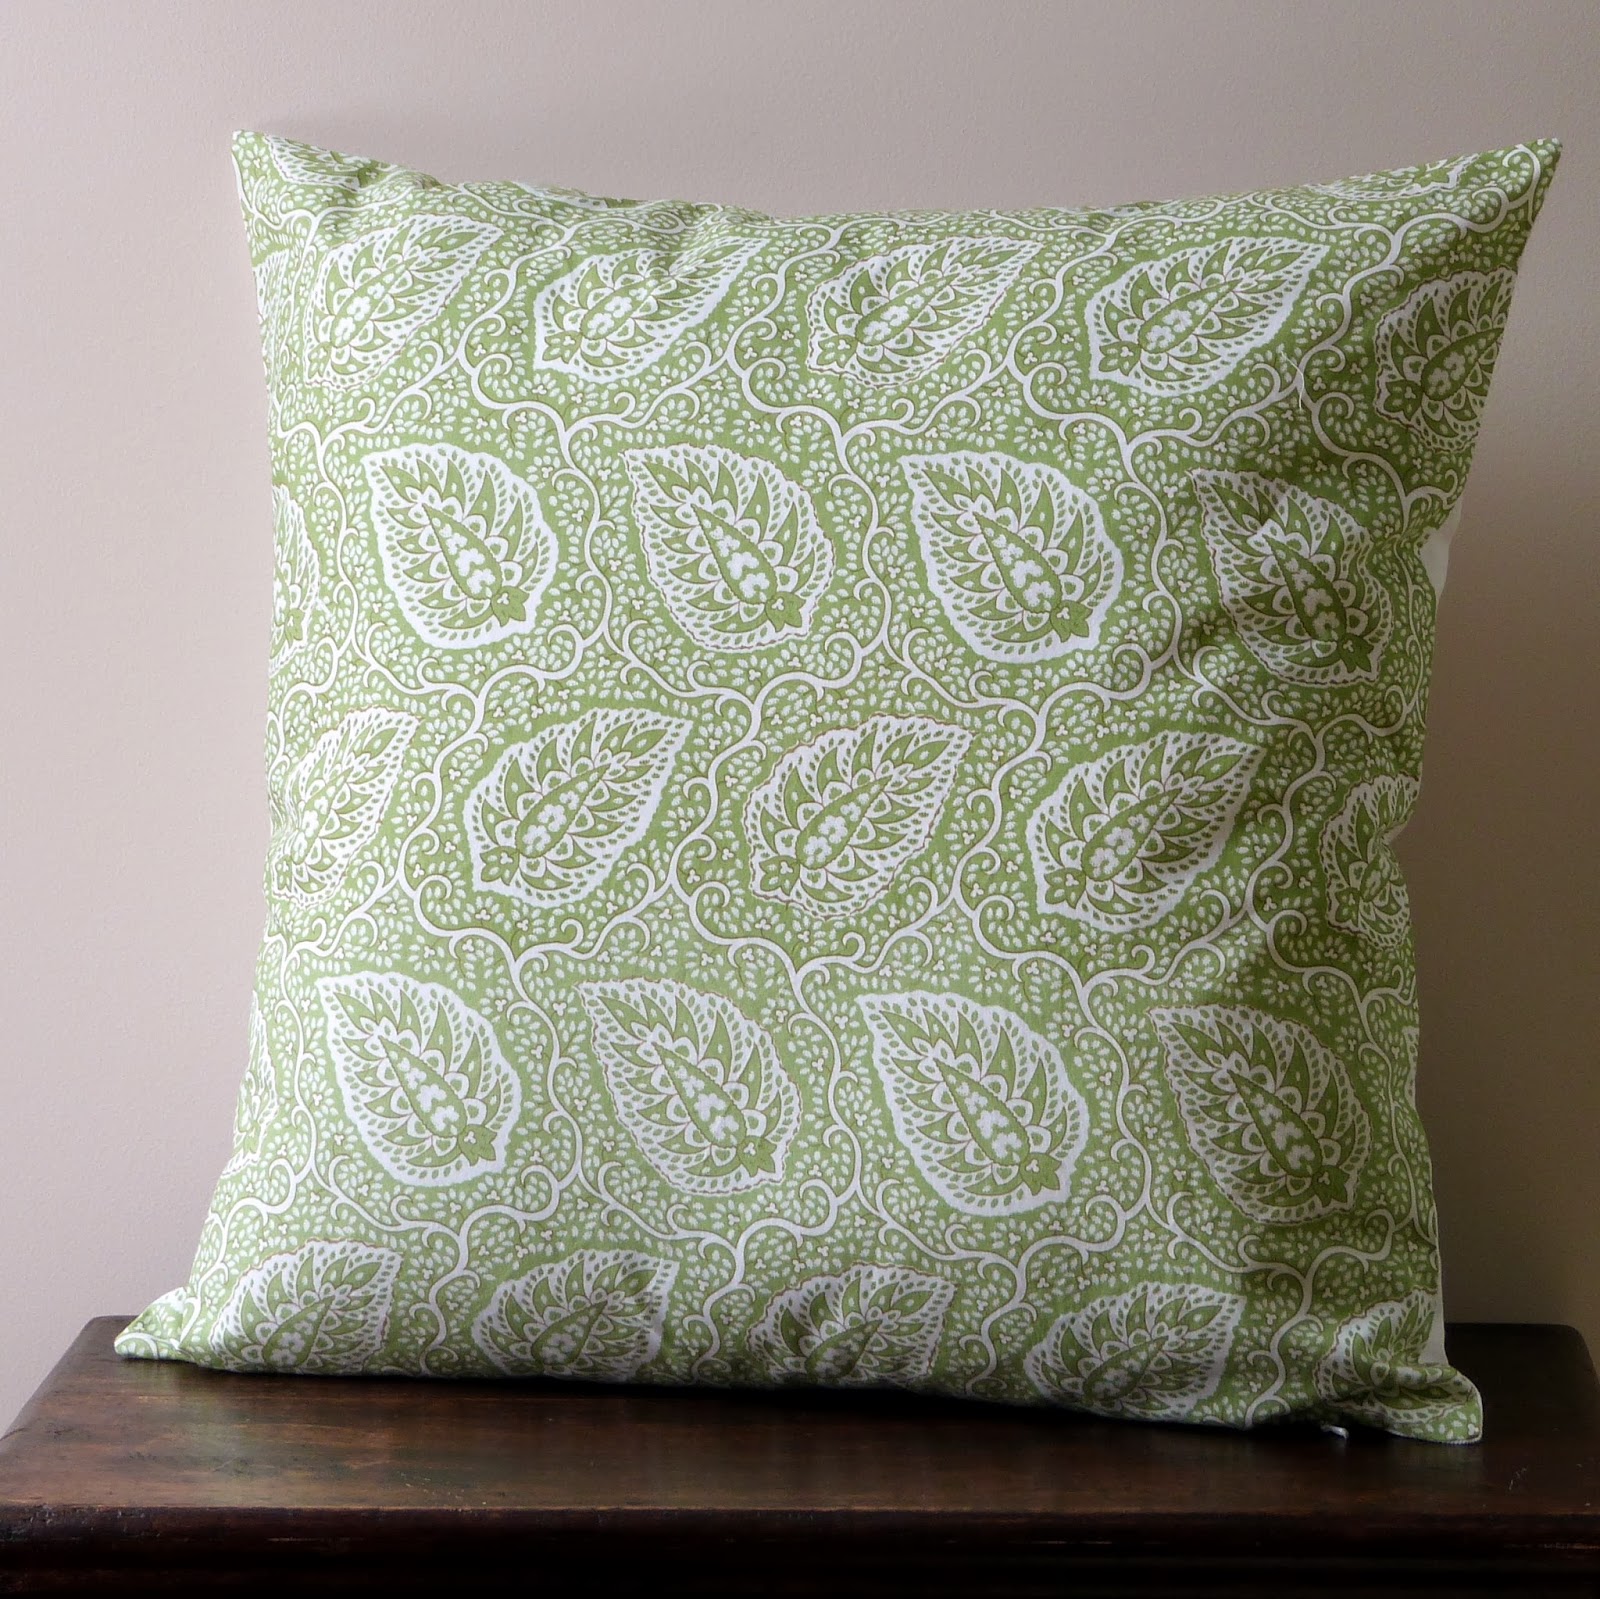
Today I made three pencil rolls in my new style. These hold twelve pencils or pens (or makeup brushes), even wider ones like fountain pens, and the roll has a flap that folds over the contents so they can't fall out when rolled and tied. Each roll uses three coordinating fabrics. That's my favorite part of making these--choosing the fabrics for them. There are so many possibilities!  If you'd like to share any ideas, please leave your thoughts in the comments. You can have a look at the fabrics available in my shop and see if there are any combos you can think of that I haven't considered.

Main fabrics, left to right: Unison "Larch," Albert Hadley "Fireworks," LuluDK "Minerva"

While I was making these today I thought (again) about how much sewing time is actually ironing. I don't really like ironing. There are napkins and tablecloths and dress shirts that have been sitting around my house for months waiting to be ironed. But ironing while sewing is essential. I would guess that I spend about half my construction time cutting and ironing at different stages rather than sewing. So I took some photos during the process of making the purple pencil roll so you could see how much ironing and other not-sewing is involved in just one little item for my shop.

First, I have to iron the huge swaths of fabric that I've purchased and hang them or store them neatly (ha! neatly!). But even before doing that I wash and dry everything. I didn't think you'd be too interested in seeing a photo of my washing machine, so I've skipped those steps. I usually try to do that right when I've brought the fabric home anyway. Next, I cut the fabric pieces according to the pattern I've made. For a pencil roll, that's seven pieces. I use my rotary cutter, which is like a pizza cutter, and a big ruler to make straight edges. I've got a number of smaller rulers I use regularly too.


Next I iron what's called interfacing to one layer of the pencil roll's fabric (no photo of this either because I forgot). Interfacing comes in many styles and adds weight and structure to what you're making. For these pencil rolls, I use a cotton interfacing that irons directly onto the back of one piece of fabric. Even though I use very high thread count fabrics, the interfacing makes the pencil roll just a little more hefty. The end product feels good and strong. If you're interested, here is a nice introduction to the different kinds of interfacing out there.


Next I iron all the little strips of fabric that make the ties and that enclose the top of the pencil pockets. Don't they look nice in the photo all together? Each of these pieces is folded (and ironed) once down the middle, then opened, then each long edge is folded (and ironed) again toward the middle. Finally, the whole thing is folded (and, yes, ironed!) again down the middle. I pin the pieces while I do the next ones so they don't undo on me.

Finally! A sewing moment! It is hard to believe how much non-sewing goes into sewing. Below is a photo of that piece of binding at the top of the pencil pockets getting sewed on. First I sew it to the pockets piece along one of those creases I made in the last step.


Then I fold the binding piece up and over to the back of the pocket piece. Naturally, I iron the seam I've just made. Every time you sew a seam, in fact, you have to press it. Every time. It sets the thread in the fabric, making it more secure. 


Above is what it looks like folded over and pressed. Below is the stitching I then did on top of the green fabric to secure that piece completely to the purple/white fabric. I try to get as close to the edge of the green fabric as possible, and I try to be really, really straight. When I first started sewing, this was not easy, but I am much better at it now. There is, by the way, a more conventional way to sew this seam below, which is to put it on the purple and white fabric, right up next to the green one, catching the green fabric underneath on the other side. It's called "stitch in the ditch." But that, I have found, is enormously difficult to do well by machine, so I just sew on the green. I think it looks very neat and trim.


 If you flip it over, it looks like this: 


See? The last set of stitching I did caught the green fabric on the back, securing it completely to the purple and white fabric. Once again, I iron. 

Then I move on to making the ties. I sew along both long edges because I think it looks better. Some people only sew along the open edge of a thing like this, but I like to do both. 


And guess what? After sewing those seams down, I go and iron the ties. 

Next up, marking where the slots will go. I use my pattern with the pencil lines and make a little blue dot with my disappearing ink pen at the top and bottom of each pocket. 


Then I join the dots with stitching, up and back on each line. I'm now attaching the pocket piece to the solid purple, which will be the inside, or lining of the pencil roll. 


When that's finished, I spray the thing with water to take off the little blue dots I made, then--woo-hoo--iron again. We are getting close to the end now, though. 


Next up, I pin the pockets/lining piece to the outside piece. I put them together so that the good sides of the fabrics are facing each other. That way I can turn them inside out later. See my cool pin holder on the left? That is a magnetized piece of Rimu wood from New Zealand that I got on my honeymoon. One of my favorite things. 


Now you see I have sewn around most of the pencil roll, leaving a space for turning it right side out, and I've clipped the corners so they will more likely come out as a point. If you don't do that then the fabric gets all bunched up there and looks pretty bad when you turn it right side out. With my trusty chopstick I poke out those corners and make sure all the edges are nice and straight. 


The very last step is to sew along the edge again, making a nice white stitching line all the way around, and closing the hole that allowed for the turning. Wait, that's actually not the last step. The real last step is, you guessed it, ironing around that new stitching along the edges. 


I didn't realize when I started these today how great they all look together, but I love the jewel tones all next to each other, don't you?


They'll be showing up in the shop soon!  Don't forget to suggest some new combos for more pencil rolls! 

Sunday, March 30, 2014

My First Sewing "Teacher"

Happy Sunday! Thought I'd tell you a little story. When I first decided to learn to sew a few years ago, I went to the library and got some books. Sure, I could whip up a pillow case without directions but I wanted to be able to make something more complicated, which was going to require some research. [Quick side note. HG is currently dragging her father around the living room dancing to "No Woman No Cry," which is pretty amusing.] One of the books was the amazing Bend the Rules Sewing by Amy Karol.


This is the perfect book for anyone wanting to learn to sew these days. You don't have to actually do any of her projects, but the unconventional directions she includes and the neat ideas offer both plenty of inspiration and plenty of practical, get-it-done advice. She's funny, she's charming, and she's a great sewer! 

Amy also has a blog, called the Angry Chicken. One of the first projects I tried from there was this fun and easy one on felt hairclips. I made a lot of hairclips. AM made a lot of hair clips. Some of ours came out pretty well, and HG even wore some for a while. She's moved on to headbands now, though. But I do still use a  bias tape application method I learned from Amy on this hysterical video. You should watch it even if you don't want to learn how to sew. What is bias tape, you ask? Bias tape is a thin folded piece of fabric that is a little stretchy (because it's cut on the bias) that covers the edge of something else. Sometimes it matches the larger fabric and sometimes it contrasts. You might have seen it along the neckline of a blouse or dress, or you can also see an example here on my snack sacks. I definitely still use her method for sewing it on!


So if you'd like sewing to be in your future, I highly recommend Amy's book to start. Go for it!  Maybe you'll open an Etsy shop too!

P.S. HG is still dancing, though the music has now progressed to Fleetwood Mac. 
P.P.S. Amy Karol has no idea who I am. I just really like her book.

Monday, March 24, 2014

Our Newest Family Member!

Did I surprise you with that one? Introducing Baby, HG's new doll (yes, that is the name HG has given her). I have been thinking for years of getting her a soft, Waldorf-style doll and have held off for a number of reasons. First, she has quite a few hand-me-down dolls from her sister. Second, a handmade Waldorf doll is expensive. Third, I wasn't really even sure she was all that interested in dolls. Turns out to have been a very, very good purchase, and well-timed, too.


Waldorf dolls are entirely soft--there are no plastic or wooden parts. They are most often made of a cotton knit fabric for the skin and stuffed with wool. The softness gives them great huggability and also allows the heat of the child to transfer to them, giving them a warmth you can't find in a doll made of synthetic materials. Their features are ultra-simple so that the child can use his or her imagination and give whatever feelings she or he wants to the doll. The man who started Waldorf education, Rudolf Steiner, thought dolls should be even simpler. He suggested that you could form one out of a napkin and make dots with ink for eyes. But there are some ideas of Steiner's that I think we can just leave with him. Actually, that idea reminds me of my friend, a mom of one of HG's classmates, who suggested that for HG's birthday I give her doll an invisible friend. Just wrap up a box and put nothing in it. This is a lot funnier than the man who seriously suggested giving a wrinkled up napkin as a doll. But still, I'm not going to do it!

Anyway, I purchased HG's doll from WildMarigold, on Etsy. HG decided on the hair, skin, and eye color. Jennie, the owner, was most accommodating when HG changed her mind at the last minute about the eye color. As a sewer, I can tell you that the construction of HG's doll is both beautiful and durable. I was not about to tackle the challenge of making a doll myself (and you can, with kits or entirely on your own), and I'm very glad Jennie made her for us. She is much faster and much better at it than I would be!


HG has been carrying Baby around everywhere. She arrived just before HG succumbed to a terrible bout of flu and missed several days of school with a fever that went as high as 104. She calls her the best doll in the world. But until today Baby hasn't had any clothes. While Jenny at WildMarigold makes clothes too, I thought I could figure that part out myself. For this first dress I adapted a pattern from ScientificSeamstress. I just used the construction method from a girls' dress pattern I bought from her (her name is Carla) and drew out a pattern free-hand that was much smaller. It took a few drawings before I had something that would fit Baby, but still the whole process of drafting the pattern, cutting the fabric, and sewing it up only took two hours or so. I've made several of those dresses for HG, and I have maybe four other patterns from Carla. If you ever want to learn to sew, I highly recommend her patterns. They are FULL of beginner-friendly advice and  tips, and they are extremely easy to follow.  As you can see from the pictures this dress is reversible with a button closure at the shoulder. I used three different fabrics for it from a line called Mimi by Moda, which I purchased at an actual fabric store back in January.


Isn't she beautiful?

Friday, March 21, 2014

The Origins of "Lila"


I learned some fascinating things this week about the word "Lila" from, of all people, my mother's yoga teacher. She tells me that he (the teacher) is an Iowan whose missionary parents, Presbyterians, raised him in Pakistan. Interesting. But I have never met him so can't really go into that. He and my mom were apparently discussing my shop and he went and looked up the origins of "lila." In Sanskrit, where it is also spelled "leela," it means "pastime," or "play." I find this fascinating because of course I started sewing as a pastime and spend a great deal of my work day "playing" with fabric and design. Then there are all those children out there playing with Lila products!

One of my customers posted this of her son trying to put on two Lila toddler aprons at a time!
There are some more complex meanings and associations with "lila" in Hinduism, which, I admit, I am at a loss to understand, but the yoga teacher's research also determined that the the word "lilac" is derived from "lila," which itself also has Sanskrit origins in the word for dark blue (still with me?), which brings me to...

Eggplant purple smock with fabric from Unison

...the reason I named my shop "Lila." Our family is bilingual. We speak German and English at home. HG's English is better than her German at the moment, but one of her first words was "lila," which is the German word for purple. It was (and might still be) her favorite color. OK, maybe that's not earth-shattering, but I think it's cute.

But wait, there's more!  In Arabic, it means "night" or "dark," and similarly in Hebrew. And there are all kinds of famous people named Lila, there are films and books and art and albums bearing the name, and, if you expand your search to include spellings like "Leila" and "Layla," you will soon become overwhelmed with the references to dark beauty, various mythic characters, and ancient epic poetry.

So there you have it! All kinds of neat linguistic history in my shop's name. And I didn't know any of it when I first opened. 

Tuesday, March 18, 2014

Waldorf Paper Lanterns


My family had some very sad news last week, which was that my uncle passed away unexpectedly. I spent a couple of days trying to figure out what I could make for his little grandchildren, who range in age from 4 to 10, that would give them an opportunity to remember their grandfather and would also be beautiful. I did a bunch of searches for things like "bereavement gifts for children," which didn't turn up anything I was interested in. Finally I started thinking about Waldorf-oriented things (why this took me so long I don't know, since a core of Waldorf is children + beautiful), and I discovered paper lanterns made from wet-on-wet watercolor paintings. I read that these are usually used for decoration at the winter holiday season, but I think they will work perfectly for this purpose as well.


We have quite a stash of watercolor paintings from school last year, and it turns out making them isn't too difficult, once you get the hang of it. I used directions from here and here. Our paper seems to be much thicker than the paper these writers used, but it still works. Ours is also monochrome because children in the kindergarten only paint with one color at a time.

If you're interested in making them, I have a couple of recommendations.

  1. Be sure you are exact as you can be with your cutting and folding. The bigger they are the easier it is to fold.
  2. Don't plan on your first one being perfect. You might even try it on regular paper first so you can get the hang of it. 
  3. This may be really obvious, but remember they are made of paper, oiled paper at that. I wouldn't leave them unattended or let children do the lighting. 

I boxed them up today and will mail them tomorrow. I am looking forward to seeing my extended family next week at the services but I do wish it were for another reason.


Tuesday, March 11, 2014

It's Official! I am an Artist!

I got the great news the other day that I am now officially an artist, according to the state of Rhode Island. Woo hoo! This year RI started exempting sales tax from galleries and artists across the state, which means that once you're certified, your items can be sold tax-free. It also means that the gain on the sale of artistic works (to use the Department of Revenue's wording) is also tax free--in other words, I don't have to claim any profits on my income tax. Right now I am deciding if they gave me the certification based on my winning arguments for why I qualify as an artist or whether it was because they saw that my sales in RI are so low that it didn't matter. 

This artistic works program came into being because the state is attempting to be known as a "State of the Arts," which is a fantastic and, I think, very appropriate goal. Rhode Island is home to one of the foremost art schools in the country, the RI School of Design, and the history of the arts in RI is also quite strong, from jewelry-making in Providence to textile milling in Pawtucket to the dozens of galleries in our oceanside communities. There has been for many years an exemption for artists in particular communities in RI, especially ones that have transitioned from industrial areas to artistic hubs. Now the law covers the entire state. Here is some more background on the decision

And here is the scintillating legalese, if you're interested. I have qualified under the "traditional/fine crafts" subheading. I am actually fairly surprised that I qualified as the people I spoke with on the phone at the Department of Revenue were quite discouraging. This is one argument in favor of the "she doesn't provide enough tax income for the state anyway, so let's just give it to her" reason for my qualification. But I don't really care about why they accepted me. I just think it's so neat that they did, since I am a completely self-taught traditional/fine craftsperson and my entire education and previous employment as been, shall we say, unrelated. 

Here is what I wrote on my application:


I consider myself an artist. I work in fabric and thread sewing mostly one-of-a-kind accessories for children, women, and the home. My items include art smocks and colored pencil rolls, handbags and belts, table linens and pillow cases. I use locally hand-screened fabric in my pieces and sell them on Etsy and at arts festivals, making each item one at a time. I personally craft all of these items and do not wish at any point to take on employees or to manufacture on a larger scale. Approximately half of my orders are custom requests and the remaining are either one-of-a-kind or extremely limited editions. The time consuming nature of my work and the limited availability of the fabric I use means I am unable to sew more than three or four of any one type of piece. The artistry and creativity involved in designing and sewing each piece is why I do what I do. My work would be far less valuable if I were simply tossing off dozens of a single product. My customers appreciate the fact that what they purchase from me will be either the only one ever made or one of a very, very few.

Here are some examples of one-of-a-kind items in my shop right now.

women's apron (comes with matching kid one if you want too)

child's nature walk bag or shoulder tote

kids play cape

youth apron


Saturday, March 8, 2014

So, How's It Going with that Serger?

It's taken me quite a while to get up the nerve to write about my not-so-new-anymore serger. The thing is that the machine is still rawther scary. Here's why: it's incredibly fast and mistakes are difficult if not impossible to fix. I feel like I'm riding a very excited race horse who doesn't respond well to my commands. It has a tendency to throw me off.

BUT, when I do get a particular part of it nailed down, it does wonders. Because it's fast, things get sewn much more quickly. Because it's a serger, it makes super duper strong seams. Because it's a serger, it cuts the fabric in a nice straight line for me, as long as I can put it through evenly while the thing is roaring to the finish line. And because it's a serger, it can do several things my conventional sewing machine just can't.

So let's look at the thing.

Here it is with all the doors open.
OK, so first off, here are some major differences between a serger and a conventional sewing machine. 1. A serger has multiple threads. Mine can be using as many as 4 at a time. 2. A serger has a knife which cuts the fabric as it enters the sewing area. Right in the top middle of this picture is a flat metal piece pointing downwards with a black screw at the top of it. That is the upper blade. You can't see the lower one in this top photo. the two together work like scissors. In the bottom photo you can see the top blade pointing down in the top left side of the picture, and the bottom blade, also a long flat metal piece and covered with lint, is on the far bottom left of the photo, pointing to about one o'clock.


Don't be concerned about the dust!  Because it cuts the fabric it gets linty immediately.
I clean it after every couple of projects, but it's never perfect.
Yes, the machine actually cuts the fabric before it sews it. There are lots of 1/4 inch or so wide strips of fabric in my trash can. This is one reason why mistakes are so dangerous. You can't go back and glue the cut fabric back on. If you swerve very slightly or stop paying attention for a fraction of a second or look at another part of the machine while feeding the fabric, you will make it cut the wrong width off and you will end up with wonky bits instead of nice straight lines. The fact that it isn't easy to make the machine go at a leisurely pace means you really, really, have to pay attention. And by "you" I mean "me."

So, next up. Those threads. In the picture above you can see all four of them, actually, looking at points like they're all tangled up. They are not. Two of the threads make straight stitches with needles just like a sewing machine. Two of them are called "loopers" because they loop around the fabric on that cut edge the machine makes to secure the fabric and prevent fraying.


Each thread follows a special path and must be inserted in a special order. You can see that my machine has colored dots to tell you where to put each thread. Some machines actually thread themselves for you with different technologies. I didn't buy one of those because a) they cost twice as much, and b) I was pretty sure I could figure out the threading myself and wasn't going to be changing threads too often, and c) my experience with my conventional sewing machine led me to want a solid, "just bloody sew gosh darn it" (yes, in real life I use other words when annoyed at my sewing machine) serger, not a serger with gimmicks. This does mean that when I need to thread the machine I must locate my reading glasses and the tweezers and the directions and get to work. The tweezers actually come with the machine. The glasses don't, though. It only takes five minutes but I am not adept at it yet. I should probably also avoid caffeine so my hands don't shake. :) The hardest part for me is threading the two needles. They are right next to each other and it's just hard to reach in back to pull the thread through.


Now, below is a photo of a lovely four-thread seam--or two of them, actually. These are going to be snack sacks. On the piece with the nylon on top you can easily see that there are two sets of straight stitches running parallel to the edge of the fabric. That is the edge that was cut with the knife. Then there are these loopy threads that curve over the edge and get sewn down by the straight stitches. Those are the loopers. In the photo with the colored dots above the two threads you see are the two loopers. 


This is what makes serger seams so strong--there are several threads going both along and over the edge of a seam. If you have a look at a tee shirt or the cuff of some pants you will see two sets of stitches running parallel to the edge of the garment and then, if you turn it over and look inside, you'll see those loops running between the two straight stitches. That is the same idea, though my machine can't actually make those kinds of seams (you need what's called an "coverstitcher" which requires at least five threads.) You don't have to sew with four threads all the time. You can sew with three of them--one needle and two loopers--or even just two of them. In the photo below you can see a "rolled hem" seam, made with three threads. See how completely different it looks from the seams above?


To make this seam I've adjusted three things, in addition to taking out one of the needles. First, I enabled the fabric to roll a teeny weeny bit onto itself after it is cut and before it is sewn. There is a sliding knob that allows that. Second, I turned another knob to adjust how wide the stitch would be. Third, I adjusted what is called the tension of the threads. In the first photo of this post you can see four knobs with numbers on them. Those adjust how tightly each thread is held by the machine as the fabric goes through it. If I tighten one of the loopers way up, the loop will loop all the way on one side of the fabric, securing that teeny folded edge in place. See how the edge of the green napkin above is rolled to the back side of the fabric? The whole effect, on these napkins anyway, is something very neat and once again very strong. You can't do either of the seams I've shown here with a regular machine, though of course a serger can't do everything a regular machine can either. For many projects I use both machines at different points. 

For instance, a seger is great with knits--those are the fabrics that make teeshirts and and other stretchy or somewhat stretchy clothes. I made HG a pair leggings in no time at all with the serger, whereas when I used to make them with my sewing machine they took longer and the seams were never really strong enough--they kept splitting since the stitches are not well designed for stretching with the fabric. At least not for the amount of stretching HG does with her clothes. When I made these leggings I serged the seams but I made the waistband casing for the elastic with the regular machine. It is possible to do that with the serger but I don't know how yet.

You are looking at the front of the leggings, inside out.
The main thing I'm struggling with now, if you haven't already figured it out, is the speed this thing has. The foot pedal, which works like your car accelerator to make the machine go, just doesn't really do slow, at least I have a very hard time getting it to go slowly. I have taken to working in my socks so I can feel better what I'm doing, but I'm still bad at making curves. I can do straight lines very well now, but my curves are not ready for prime time. I was hoping to be able to toss out a whole lot of snack sacks for my shop, but the tops of those are one nice big curve, and the first time I tried it I completely ruined it 'cause I thought it would be easy, so I need a lot more practice. I should have taken a photo of the ruined snack sack before I threw it out. It was pretty awful. You would have laughed. I did not.

So that's the basics, and it was still a long post. I'd love to hear from you about anything else you'd like to know about the serger. If you ask, I will write it! 


Tuesday, March 4, 2014

The Most Invisible Zipper You've Ever...um, yeah


Yes, that's right folks. Here is an example of a perfectly invisible zipper which CANNOT BE SEEN AT ALL. I am sharing this with you because I only learned how to sew invisible zippers a couple of weeks ago. I would say I am getting pretty good. I also serged the seams on this baby and for the first time today TURNED CORNERS with the serger, ta da. I've promised more to come on the serger. Just want to take some more photos first.


If you're interested, the green and white fabric is called Oldwick and is by Sister Parish Designs. More about her in a future post.  For now you can just enjoy this gorgeous pillow. :)


Sunday, March 2, 2014

"I am DONE with King Winter!"


HG's snowmen, sporting handmade hats and scarves.
So said HG this morning when we noticed the first snow flurries of our latest storm. While some of you are starting to enjoy little pieces of spring sunshine, and others across the world might be enjoying autumn, we here in New England are having just more and more winter. At our house there's been quite a lot of snow shoveling and days off from school, and plenty of hot chocolate and weekend afternoons inside by the fire, plus a few good sledding days. These activities always seem cozy and fun at the beginning of winter. Here's some sledding we did a couple of weeks ago.


At this stage many of us are pretty weary,  including even children! So here's a few ways to brighten your outlook and bring some color to the season.

During a rare day with bare ground HG gathered some sticks from the yard and brought them inside. She had the idea to cut out some stars and moons and also to tie little pieces of colored ribbon to her branches and put the decoration in a vase. We used her painting paper from school to make the stars. You can read more about Waldorf kindergarten wet-on-wet painting here.


The colored jars are lanterns, also made at school. They have a little tea light inside them and wire handles.


I made a snowflake garland out of glittery white eco-felt and blue card stock and just hung it with thread. No, I didn't design the snowflakes myself as I can't draw. At all. I traced them, which, if you're wondering, still counts as being creative in my book.


Lastly, HG brought home a simple Waldorf window star she made at school.


These are really beautiful decorations made from thick tissue paper called kite paper, which can be purchased easily online. There are lot of tutorials out there too and some books as well. If you're not really interested in making the stars yourself, there are some lovely, complicated ones from people on the Waldorf on Etsy team. Here are two of them.

A star from harvestmoonbyhand

One from La Lutine.

So if King Winter is still hanging around your part of the world, try out some of these simple activities to add some color!